Corner Tops and Rails
Click on the images to embiggen.
Tops
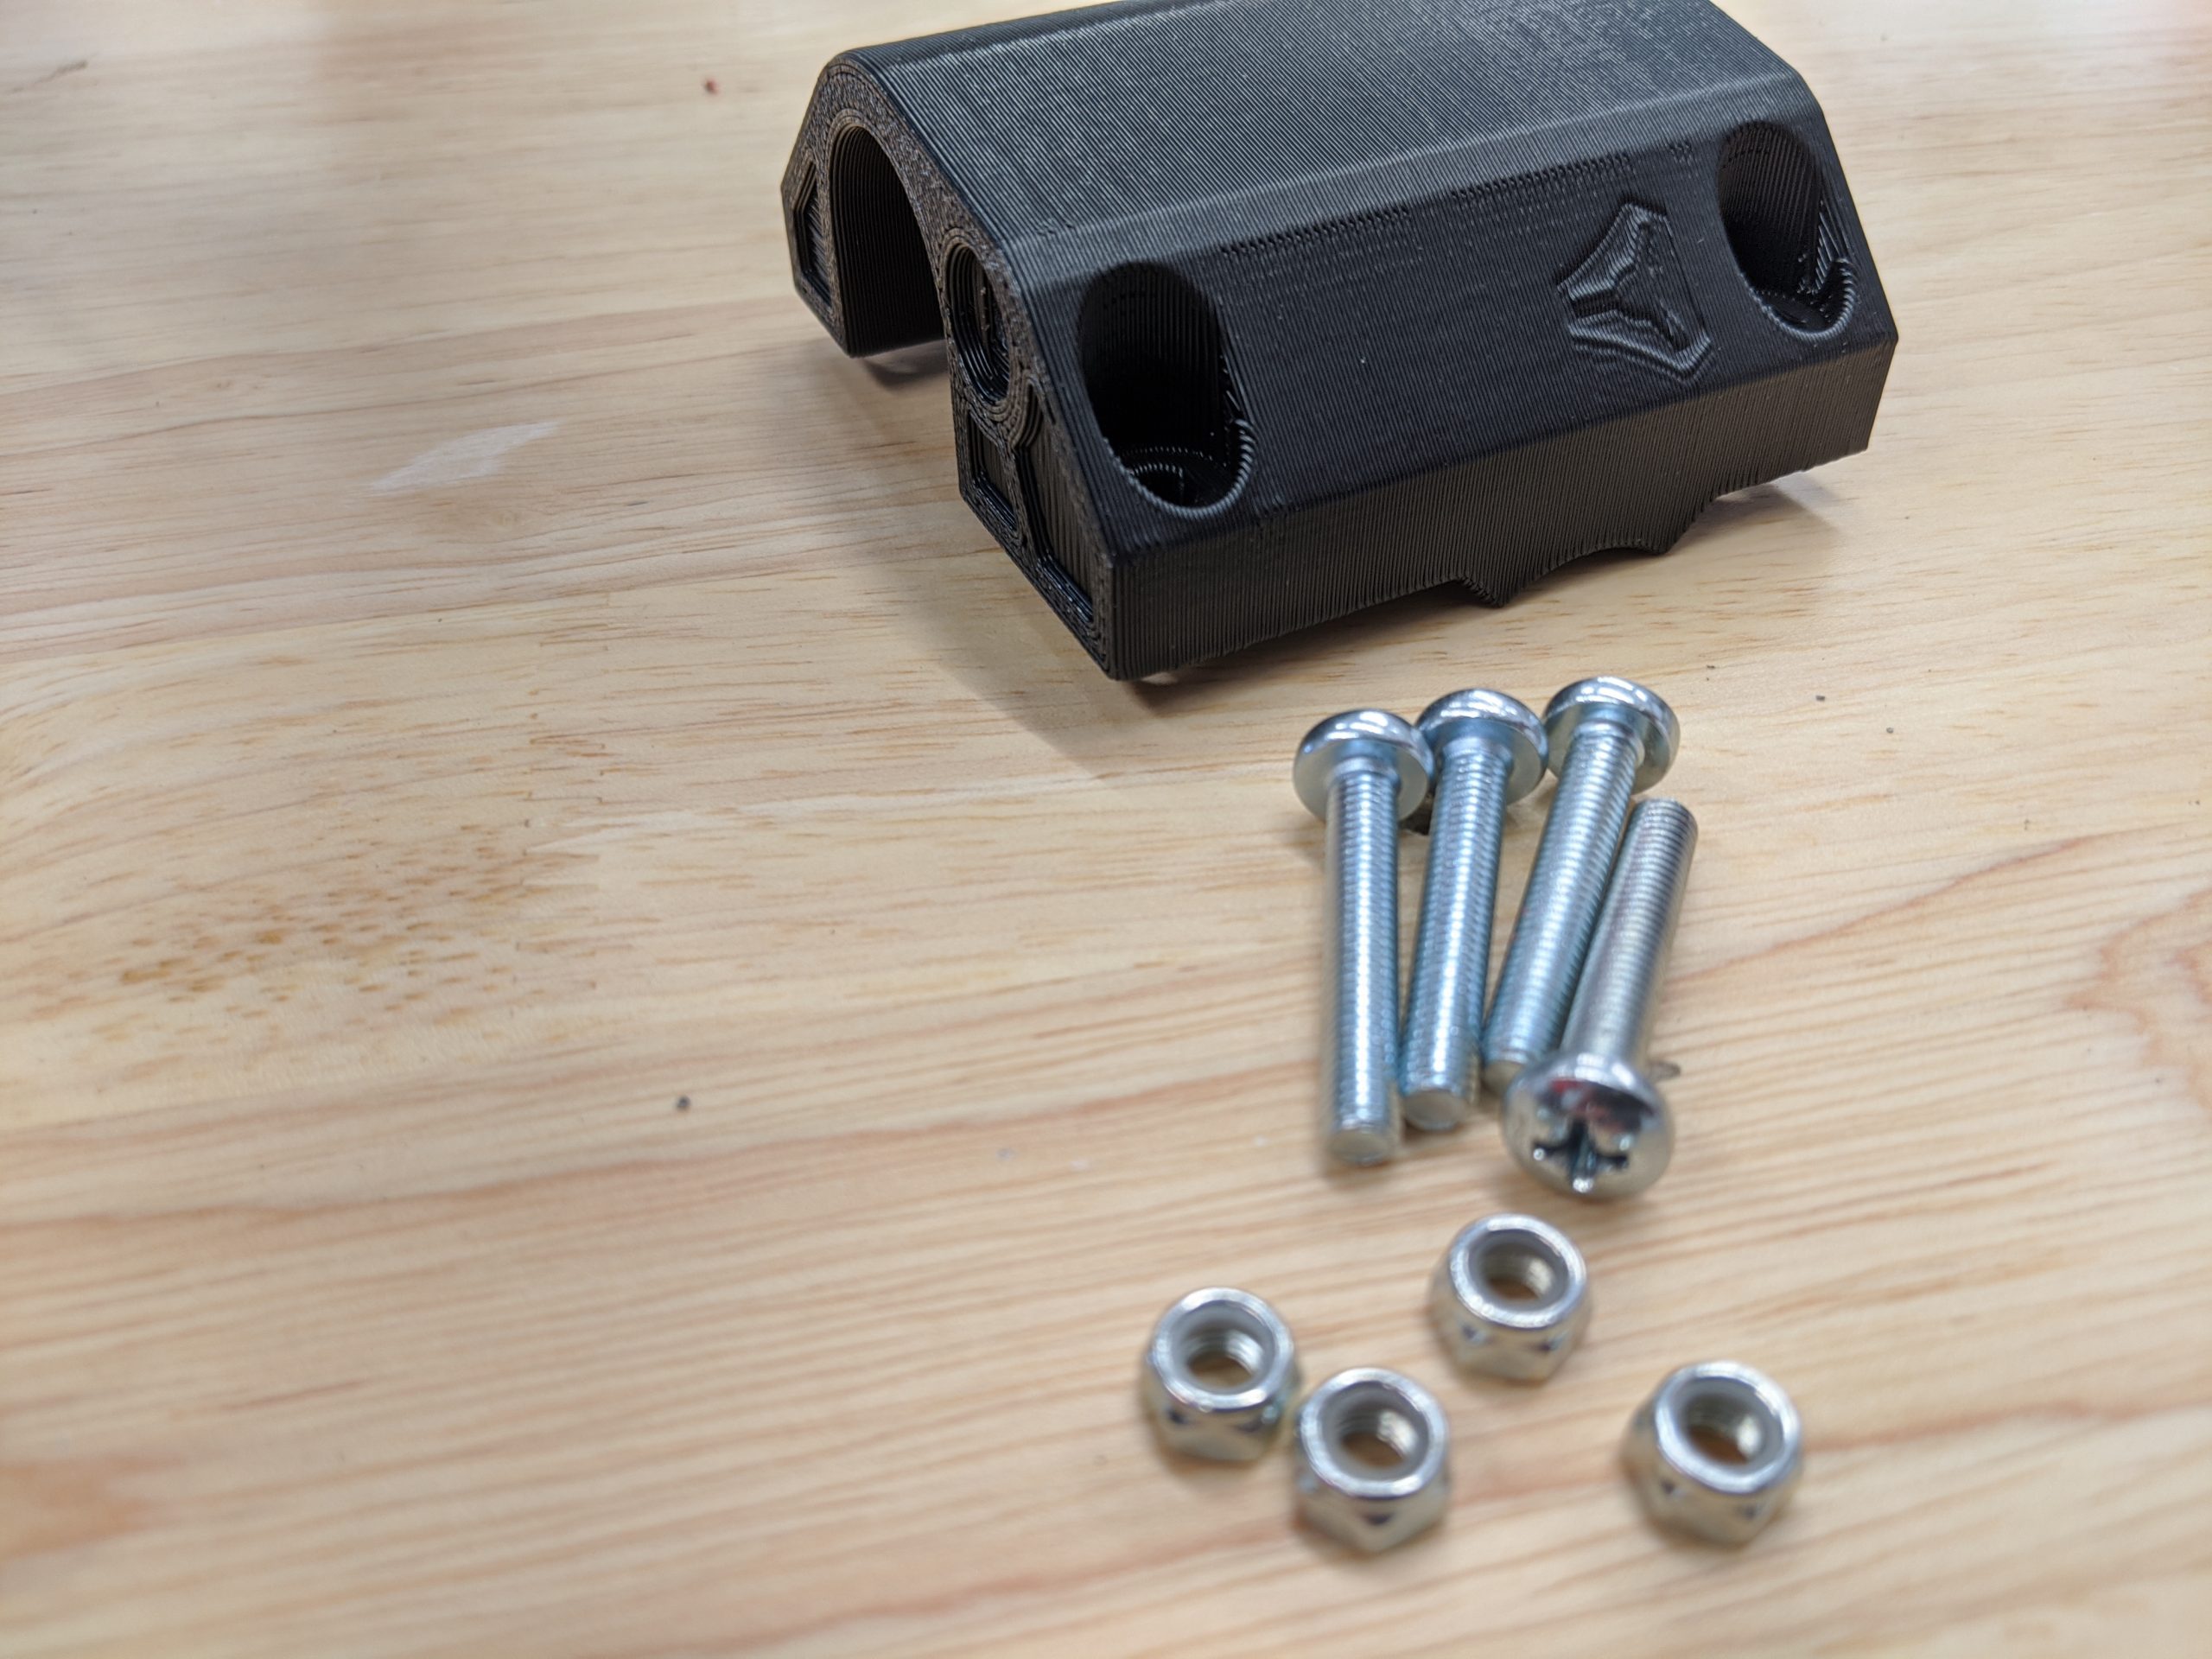
- You will need the printed Corner Top and Corner Top Mirrored parts
- M5 screws and nuts
- All 4 X and Y rails
- Truck assemblies from previous step
- #2 Screwdriver
Layout
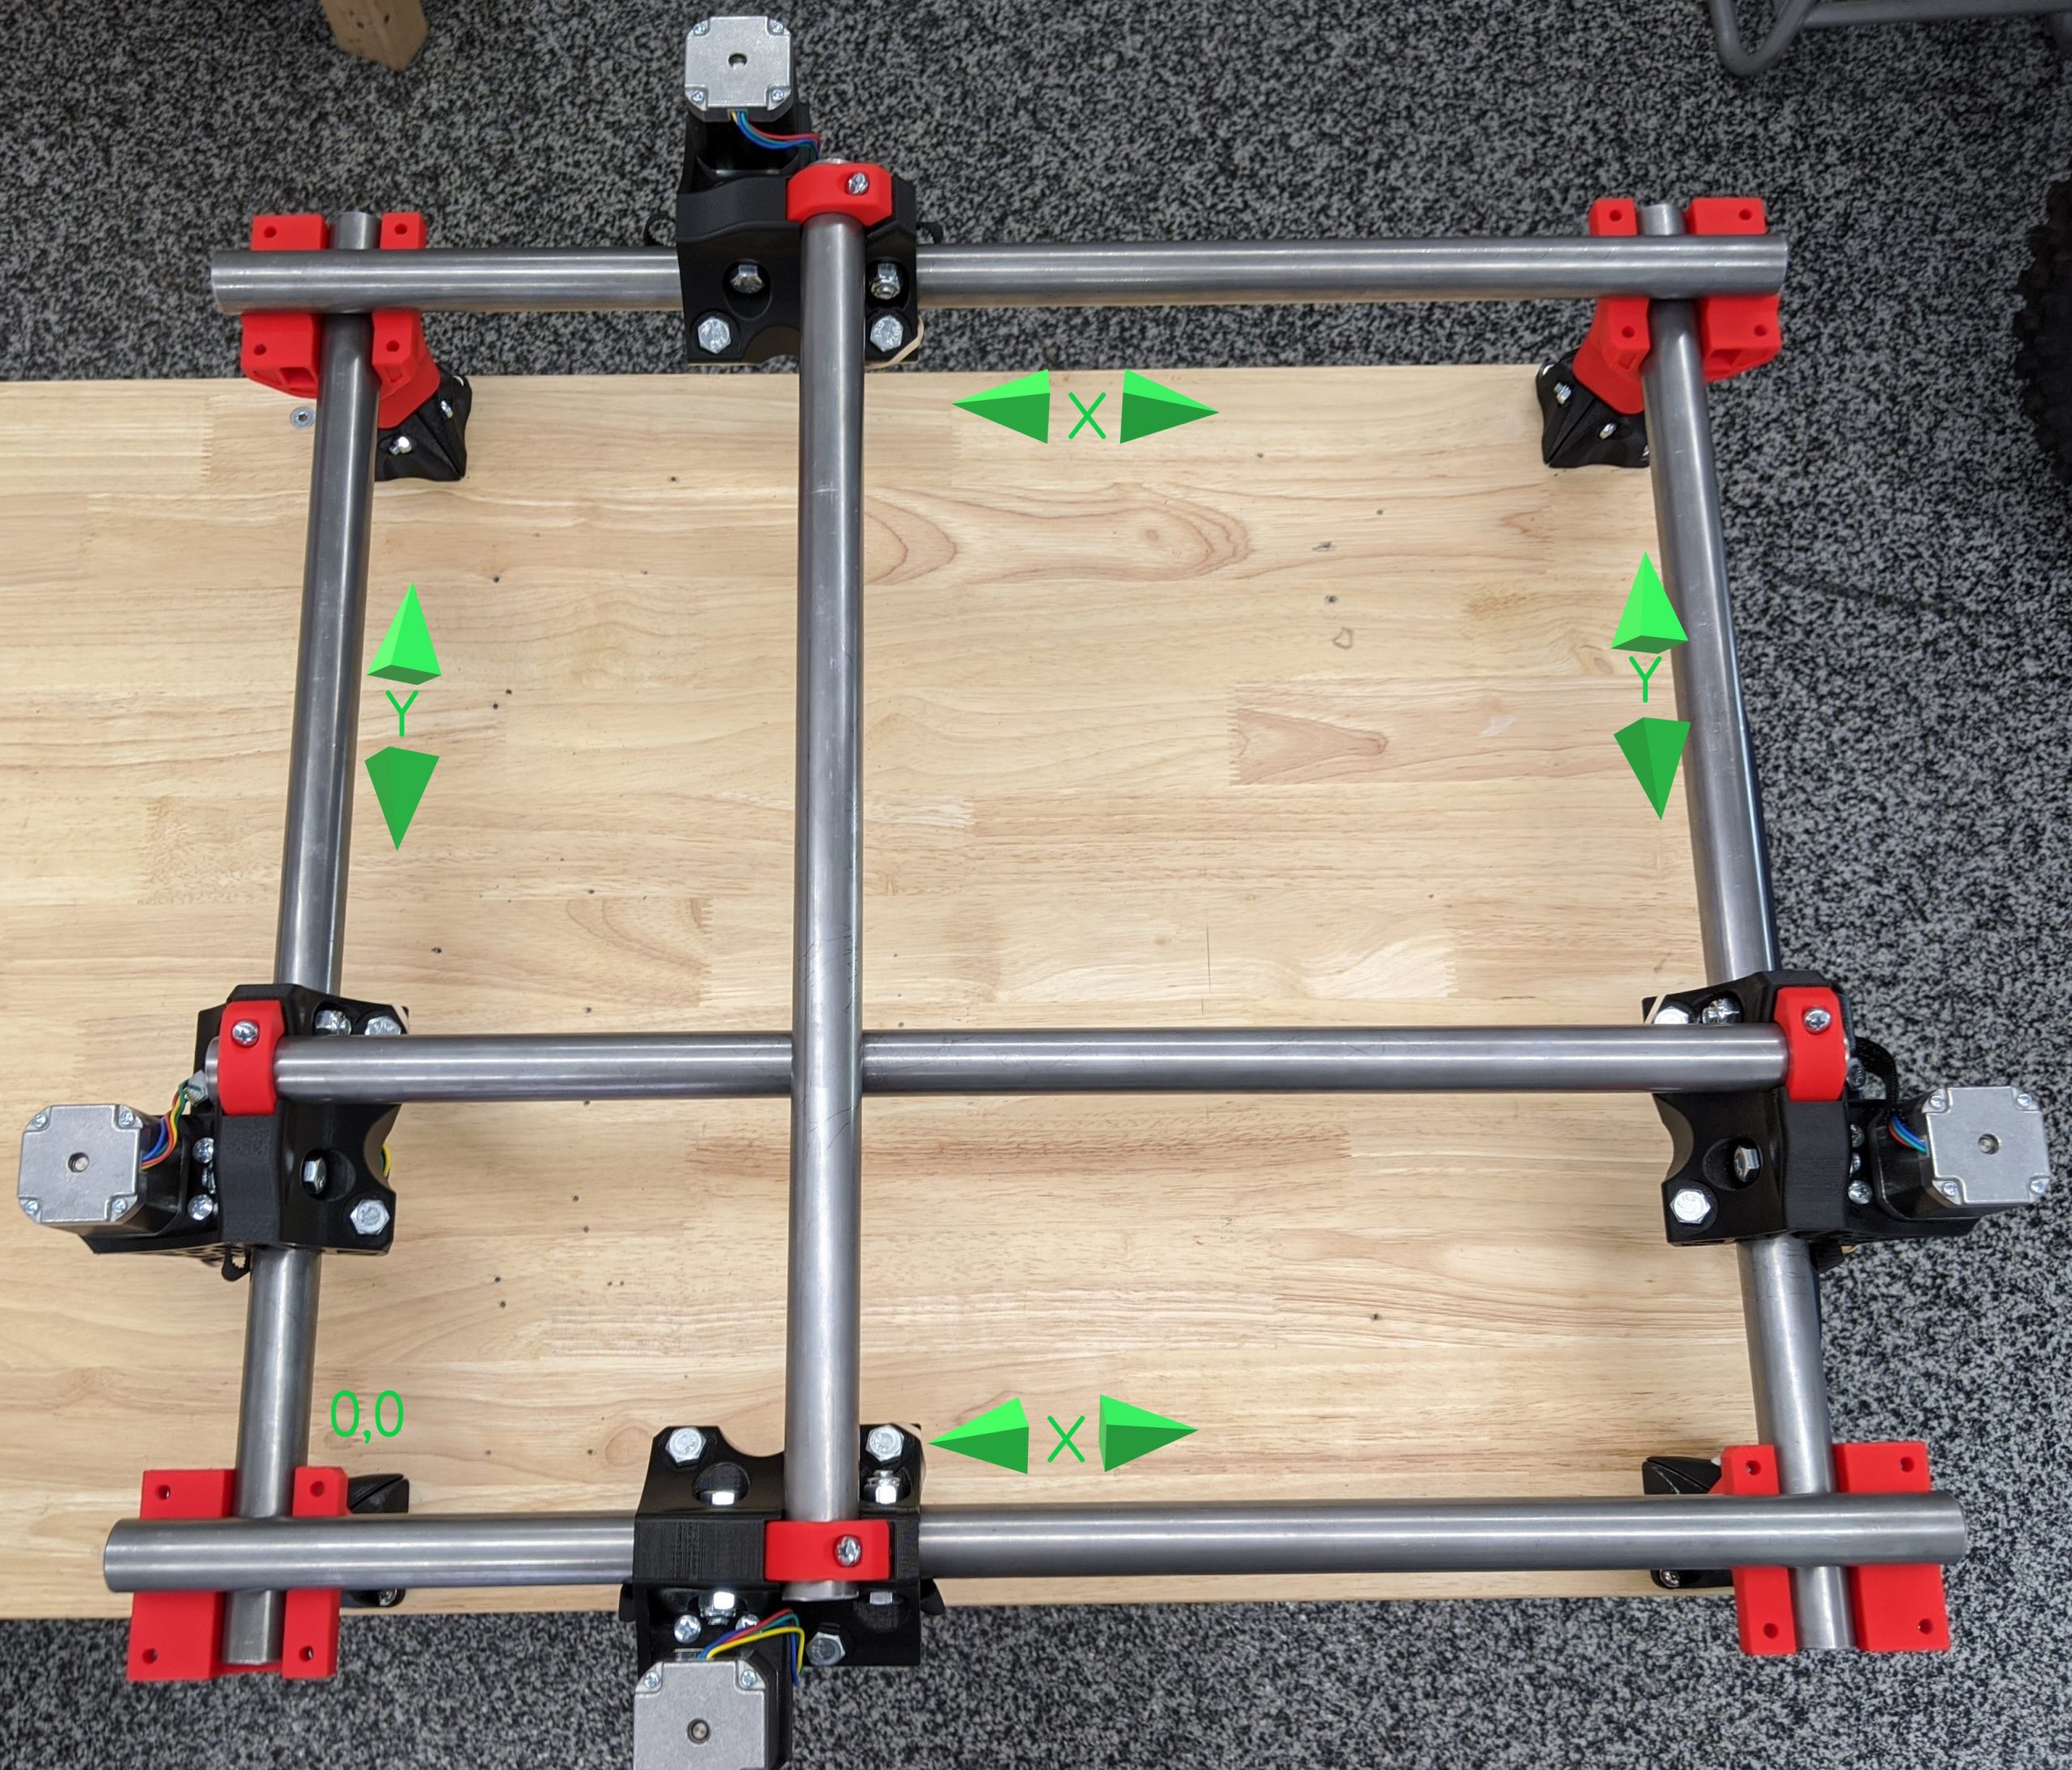
- Use this picture to orient the Trucks and sort out your X and Y rails
- You do not need the gantry rails at this point, they are just in this picture to clarify the position of the Trucks.
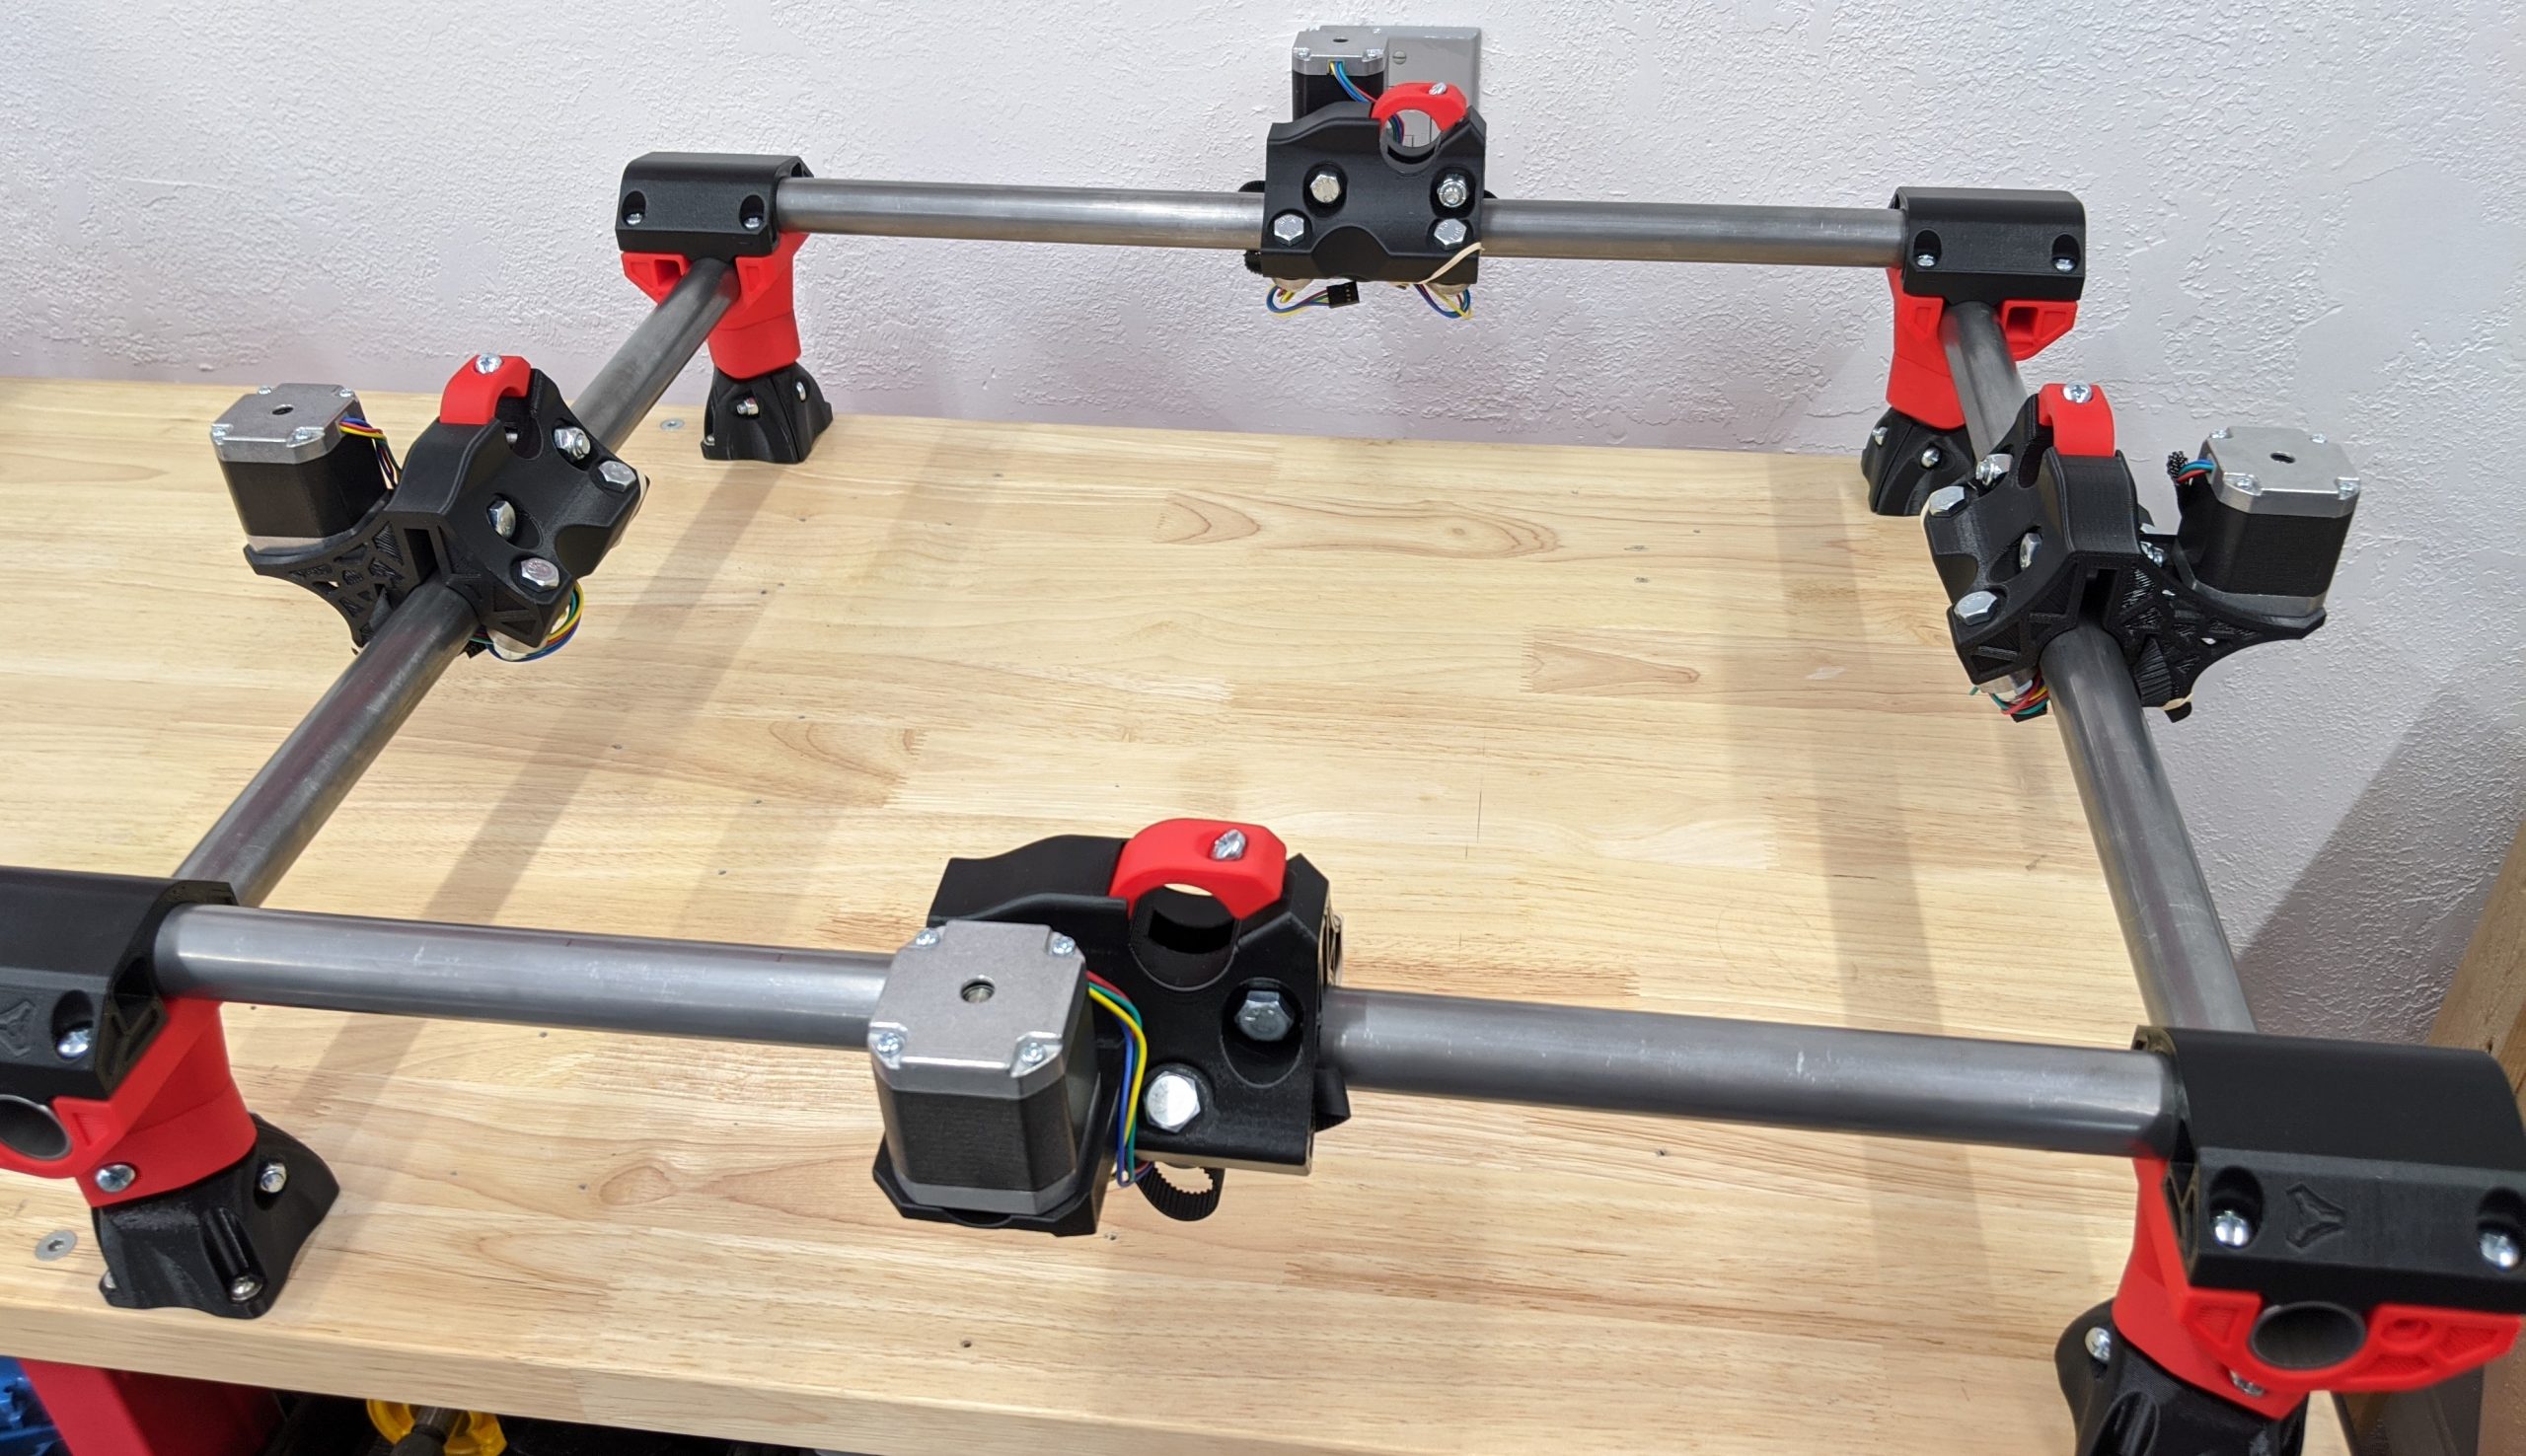
- Add the tops.
- Pay close attention to the belt slides: they should be on the opposite rails of the Corner Bottom parts.
- Add the screws and nuts and lightly seat them all.
Caution
With all the captured nuts you should pre-thread the screws at least once to loosen the locknuts up a bit to not destroy the printed parts.
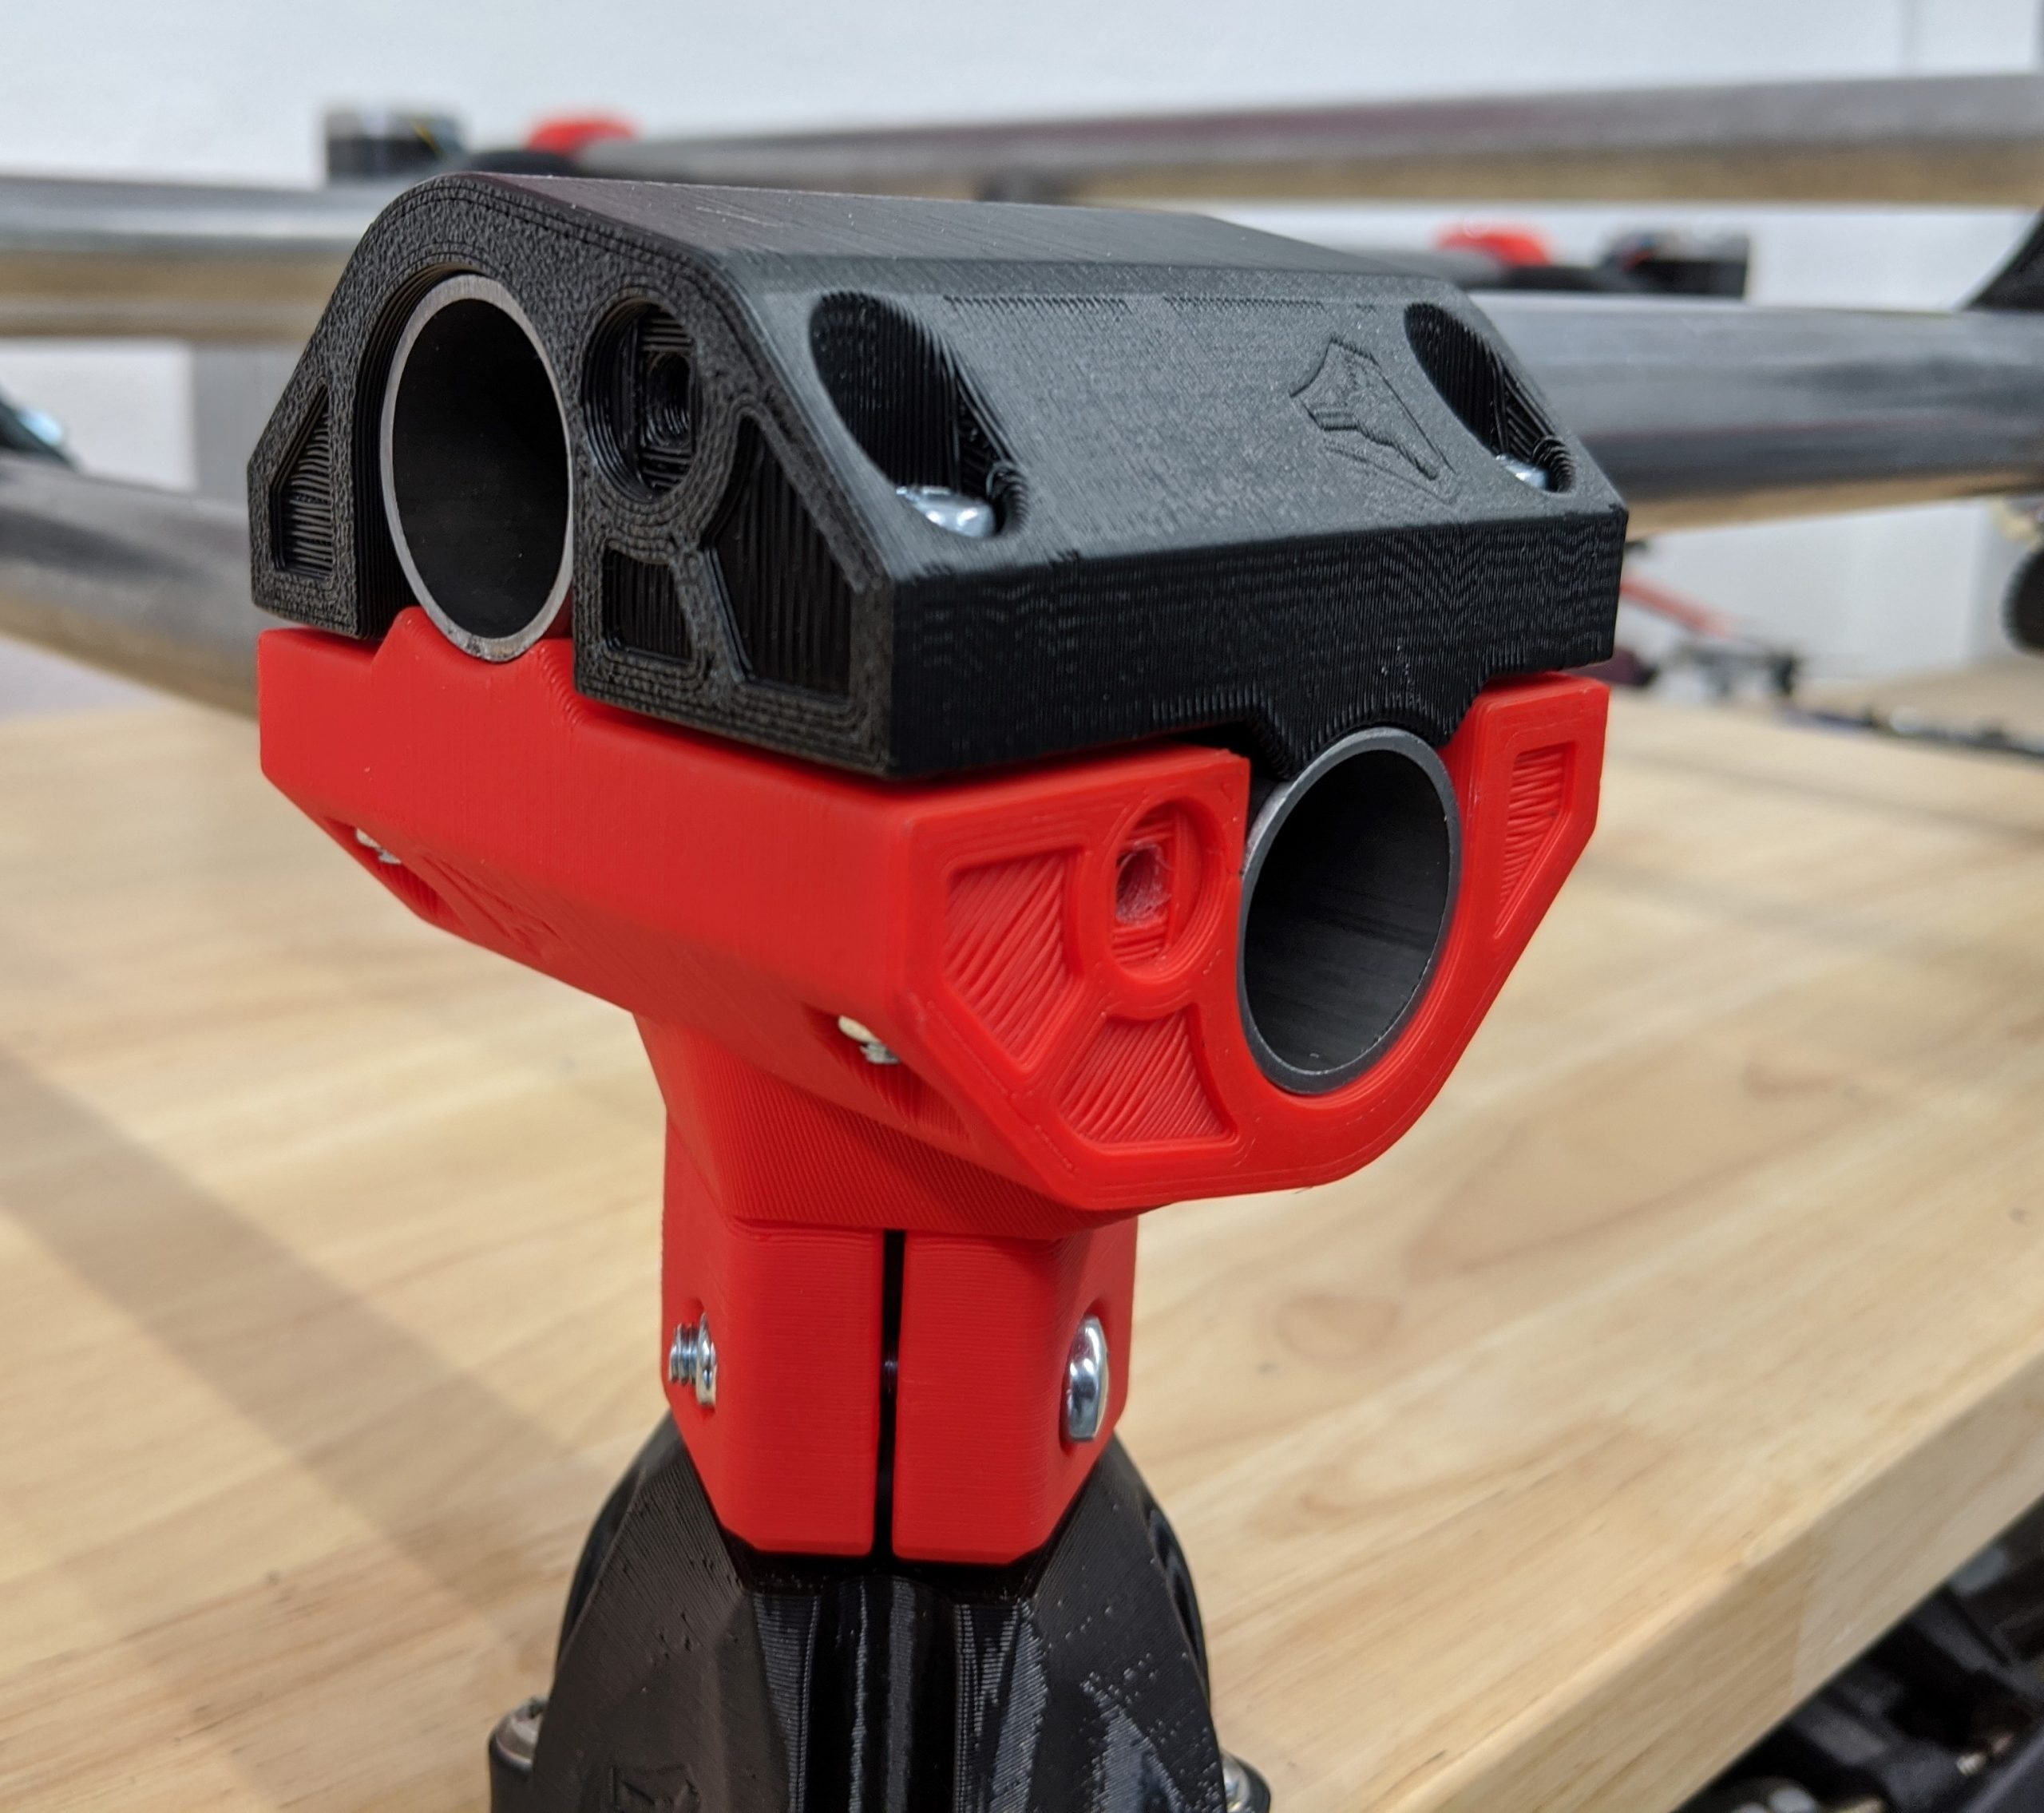
- Notice the even gap in the corner pieces. They all should have this.
- Slightly snug down the screws evenly, leaving an even gap on all sides.
- Snug means the rails will still be able to rotate if you try. You should feel some resistance though.
- Do not over tighten these screws.
Caution
The corner parts are the most commonly over tightened and broken pieces on both CNCs. There is absolutely no need. You can always add tension if there was a problem but cracking a part requires printing or buying a new one. Remember, there is no need to stop the rails from rotating.
Truck Squaring
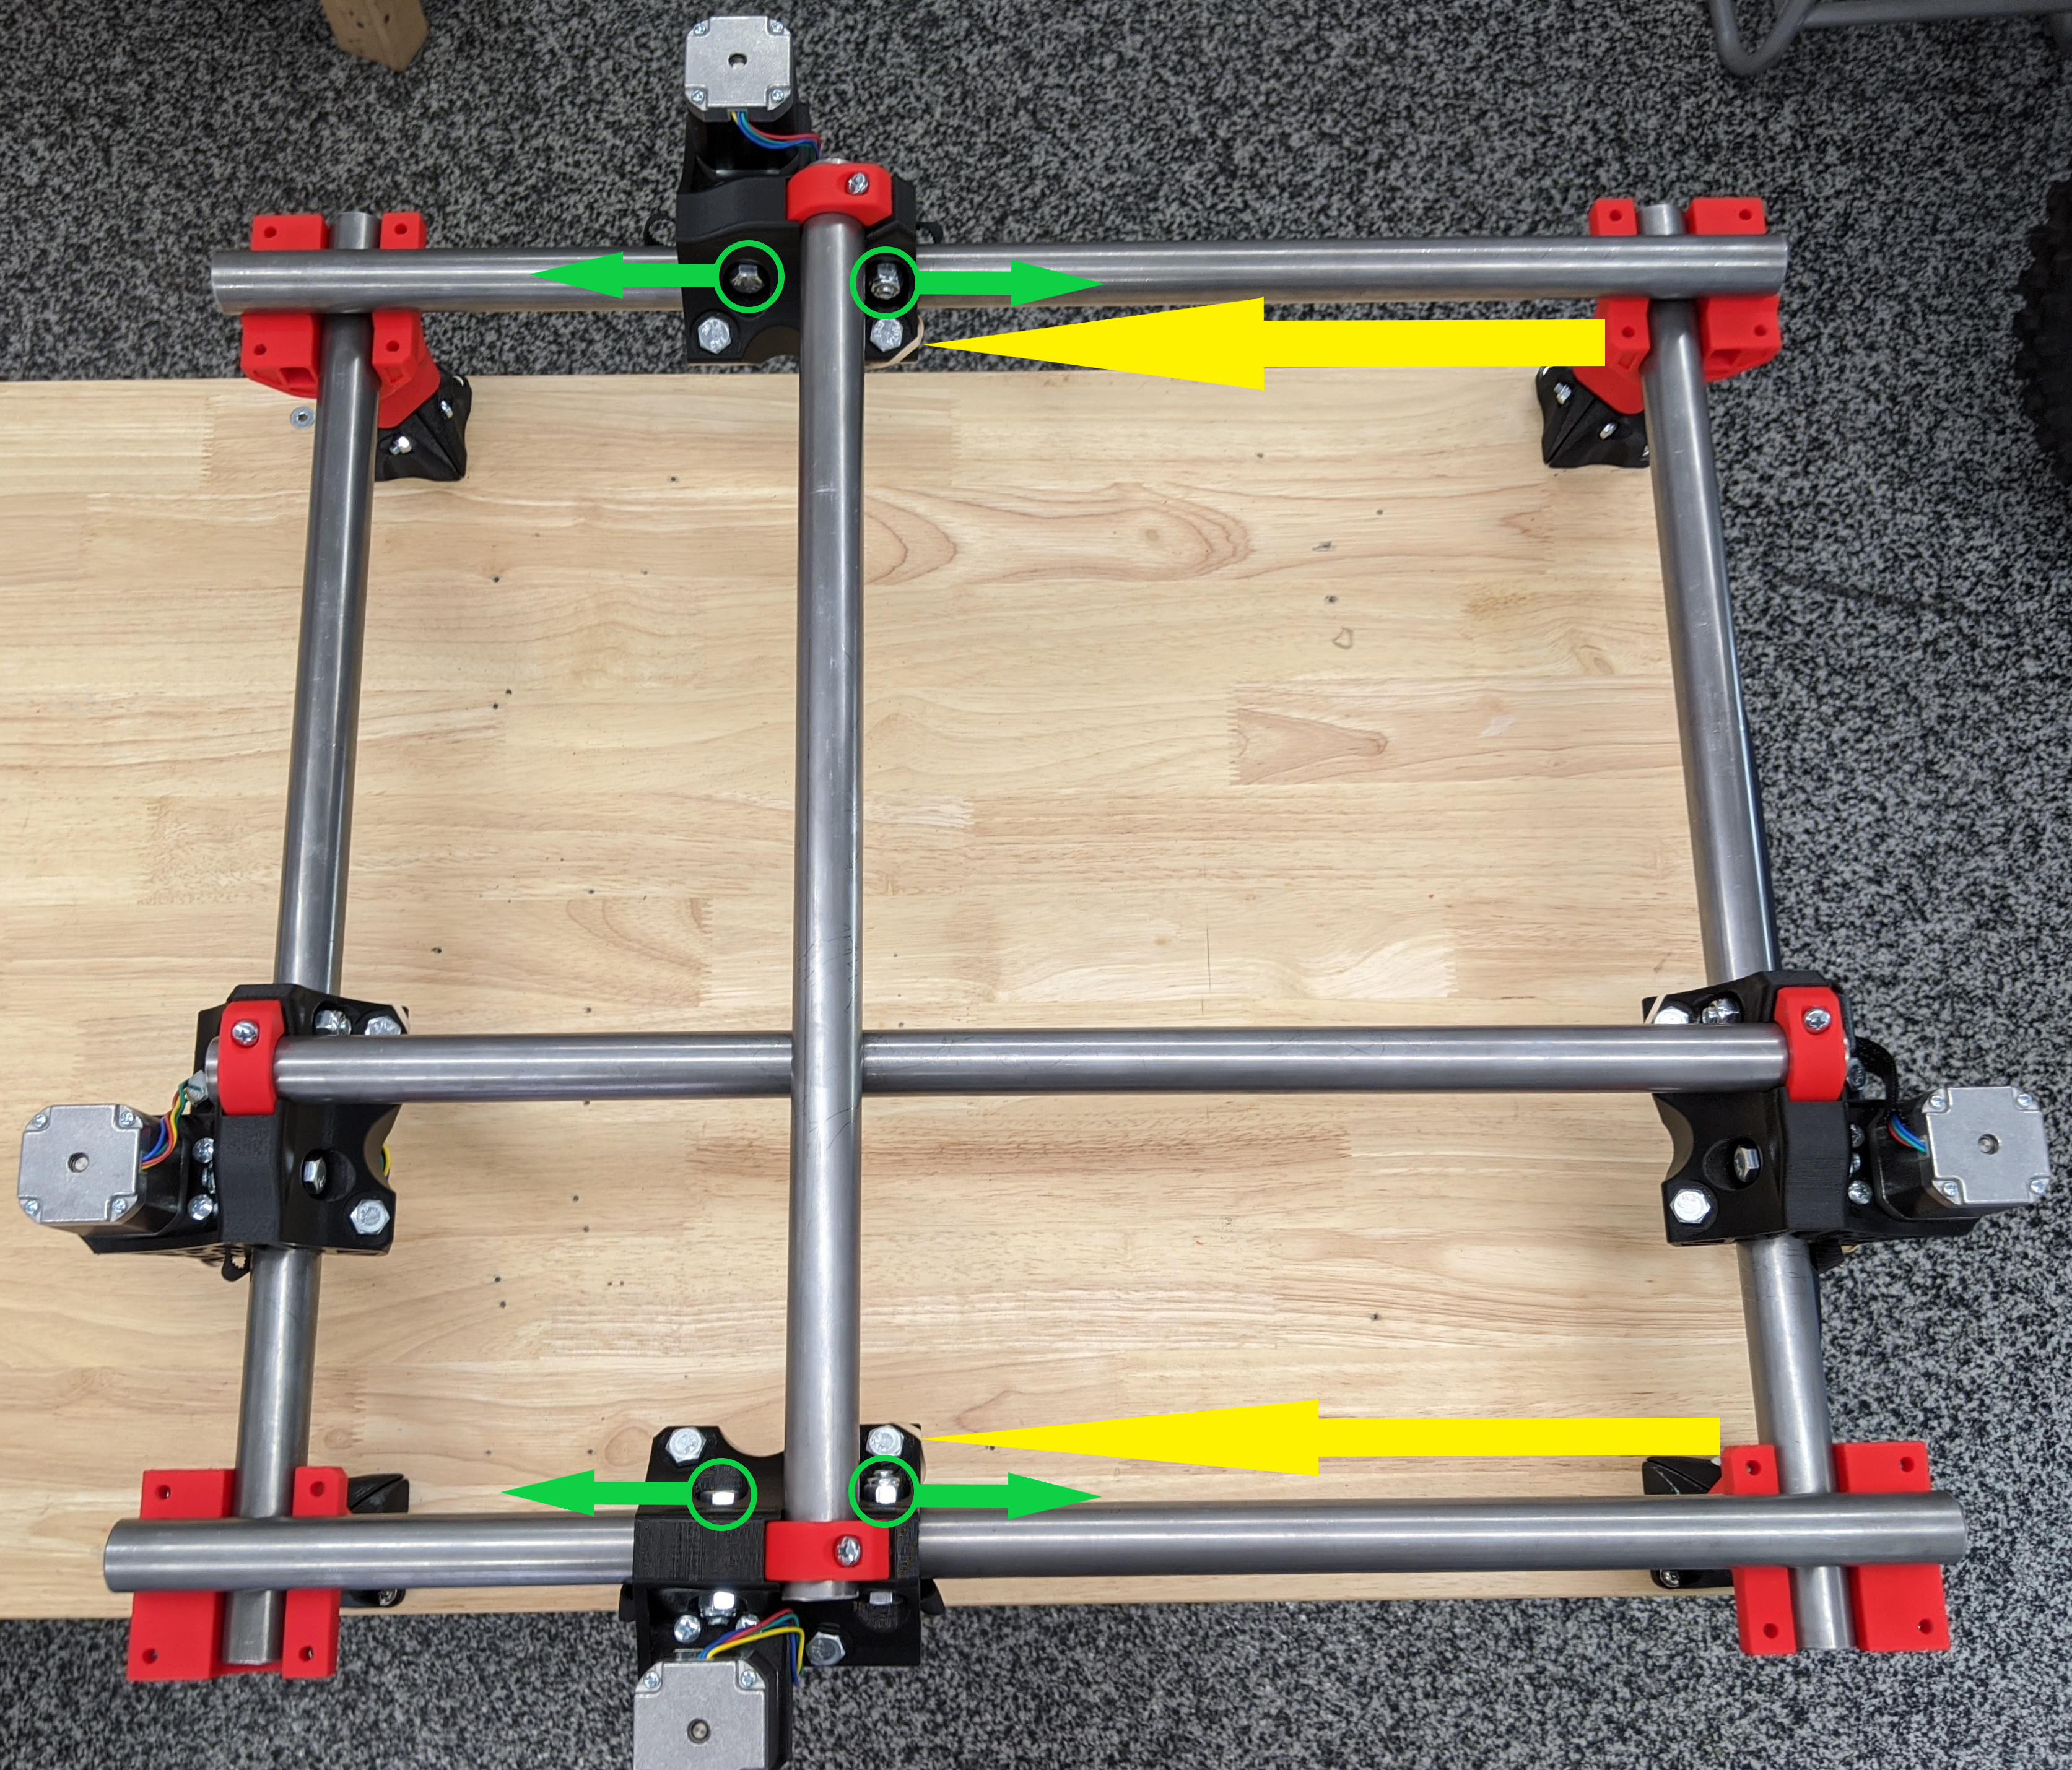
- New to the Primo version, before moving on it is best to square your Trucks.
- Clamp in your gantry rails.
- Move the axis around to settle it.
- Measure from the Trucks on the same axis to either corner (yellow arrow).
- Now you can move the Trucks by very slightly tightening the tension bolts.
- Start small: try 1/16th of a turn (green arrows).
- Too tight and it will stop moving.
- Loosening will relax it opposite the green arrows.
- Check both axes, again looking for 1mm or under.
- Remove the gantry rails.
Another step done home slice!
