Assembling The Trucks
Click on the images to embiggen.
Bearings
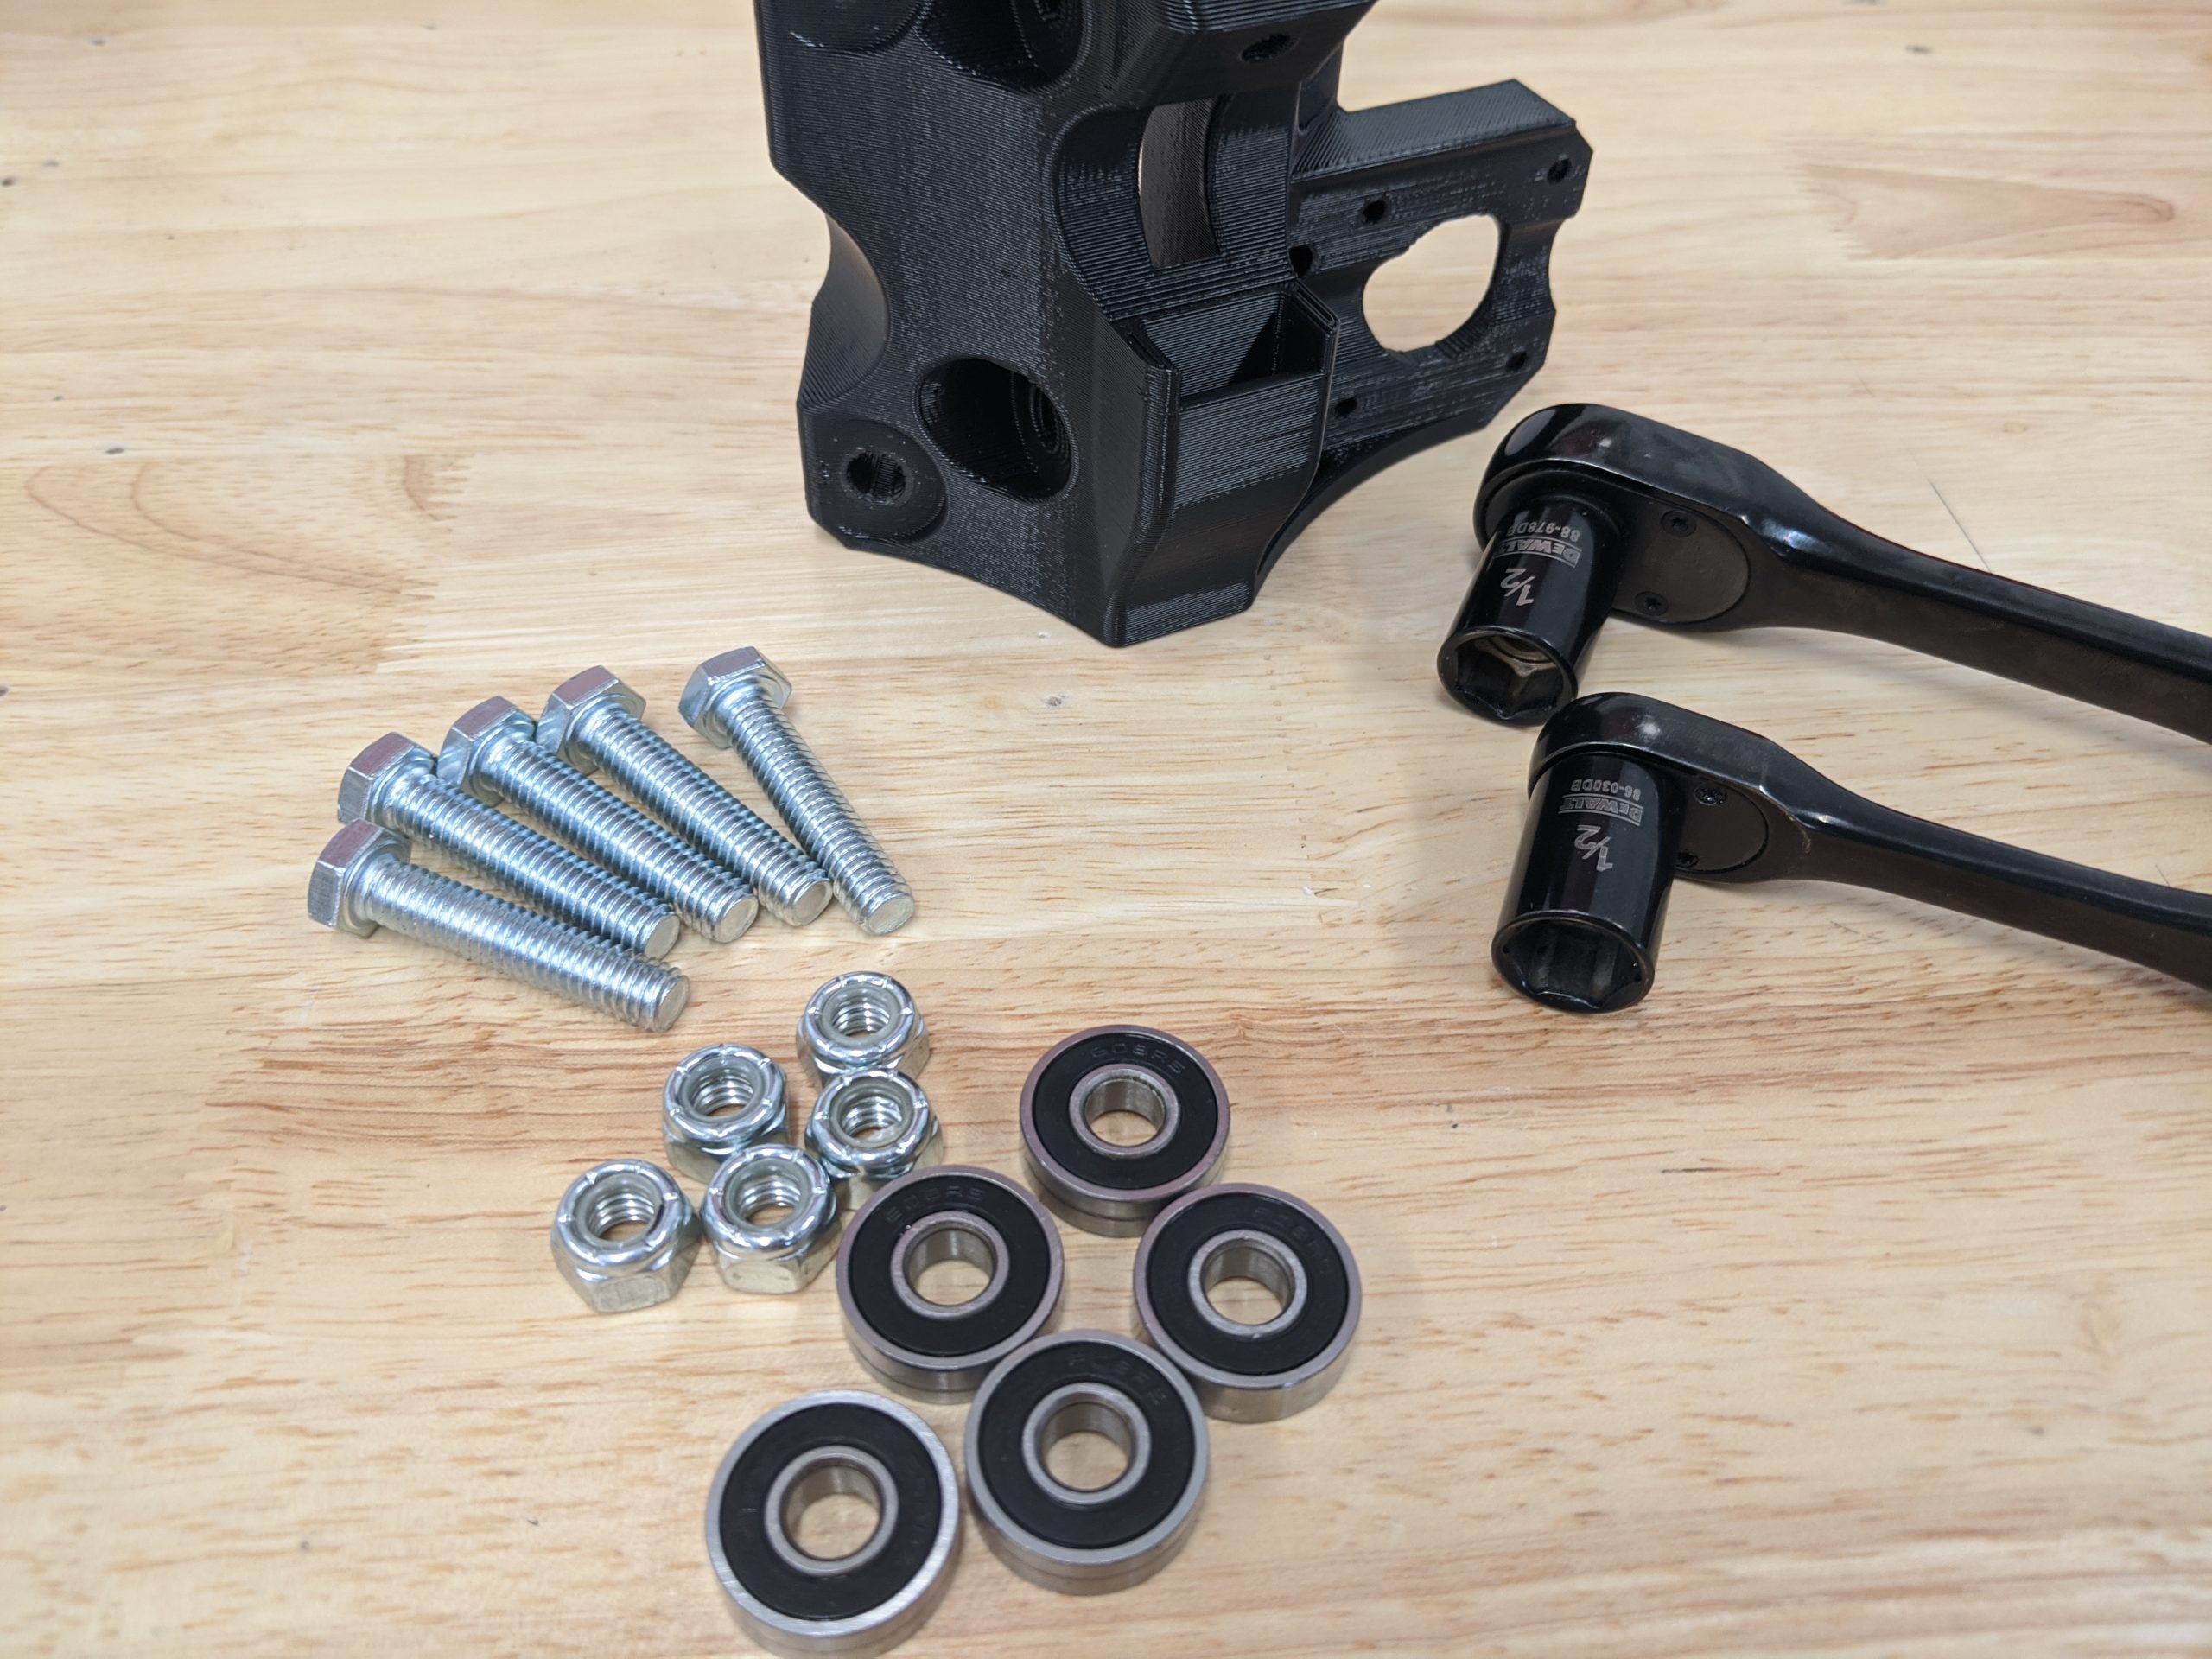
- You will need 5 sets of 5/16 x 1 ½” (M8 x 40mm) bolts and locknuts.
- Two ½” sockets and ratchets (or 13mm for M8’s), or one and a wrench.
- 5 bearings.
- Printed Truck and Truck Mirrored parts.
Tension Bolts
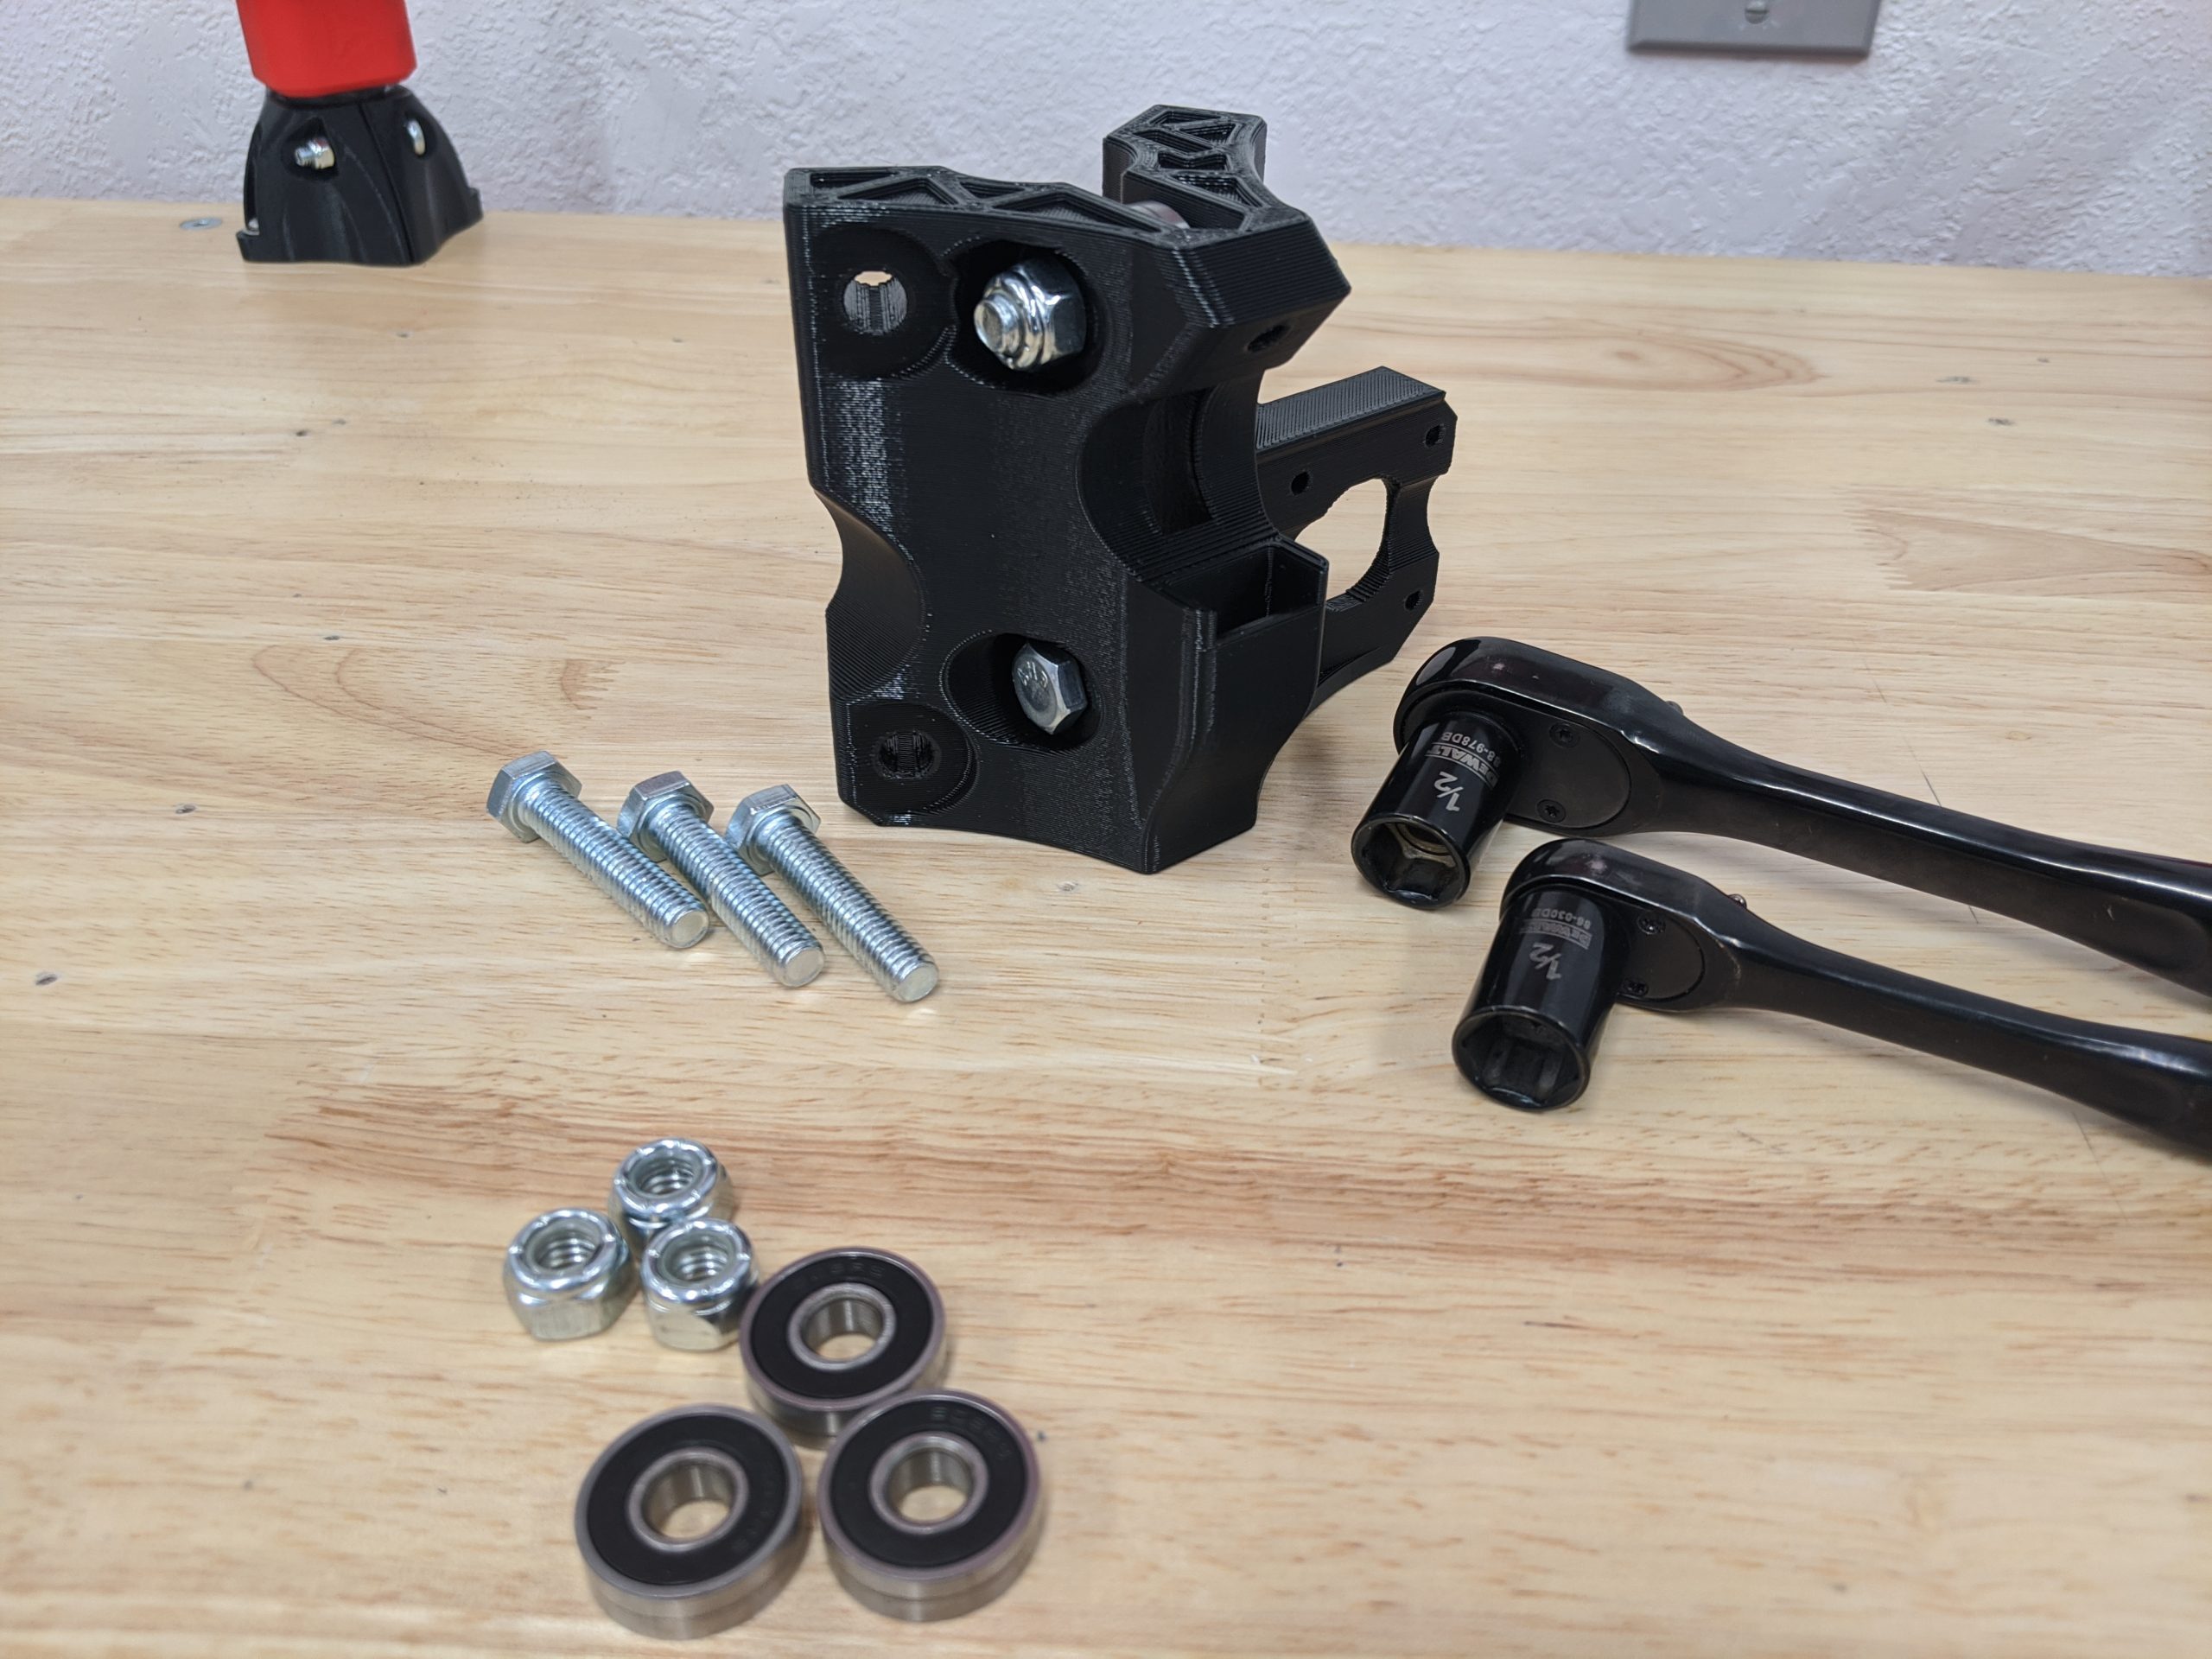
- Insert the bearings in the Truck and fit the bolts.
- Just seat the locknuts, they will get adjusted later. Leave them loose.
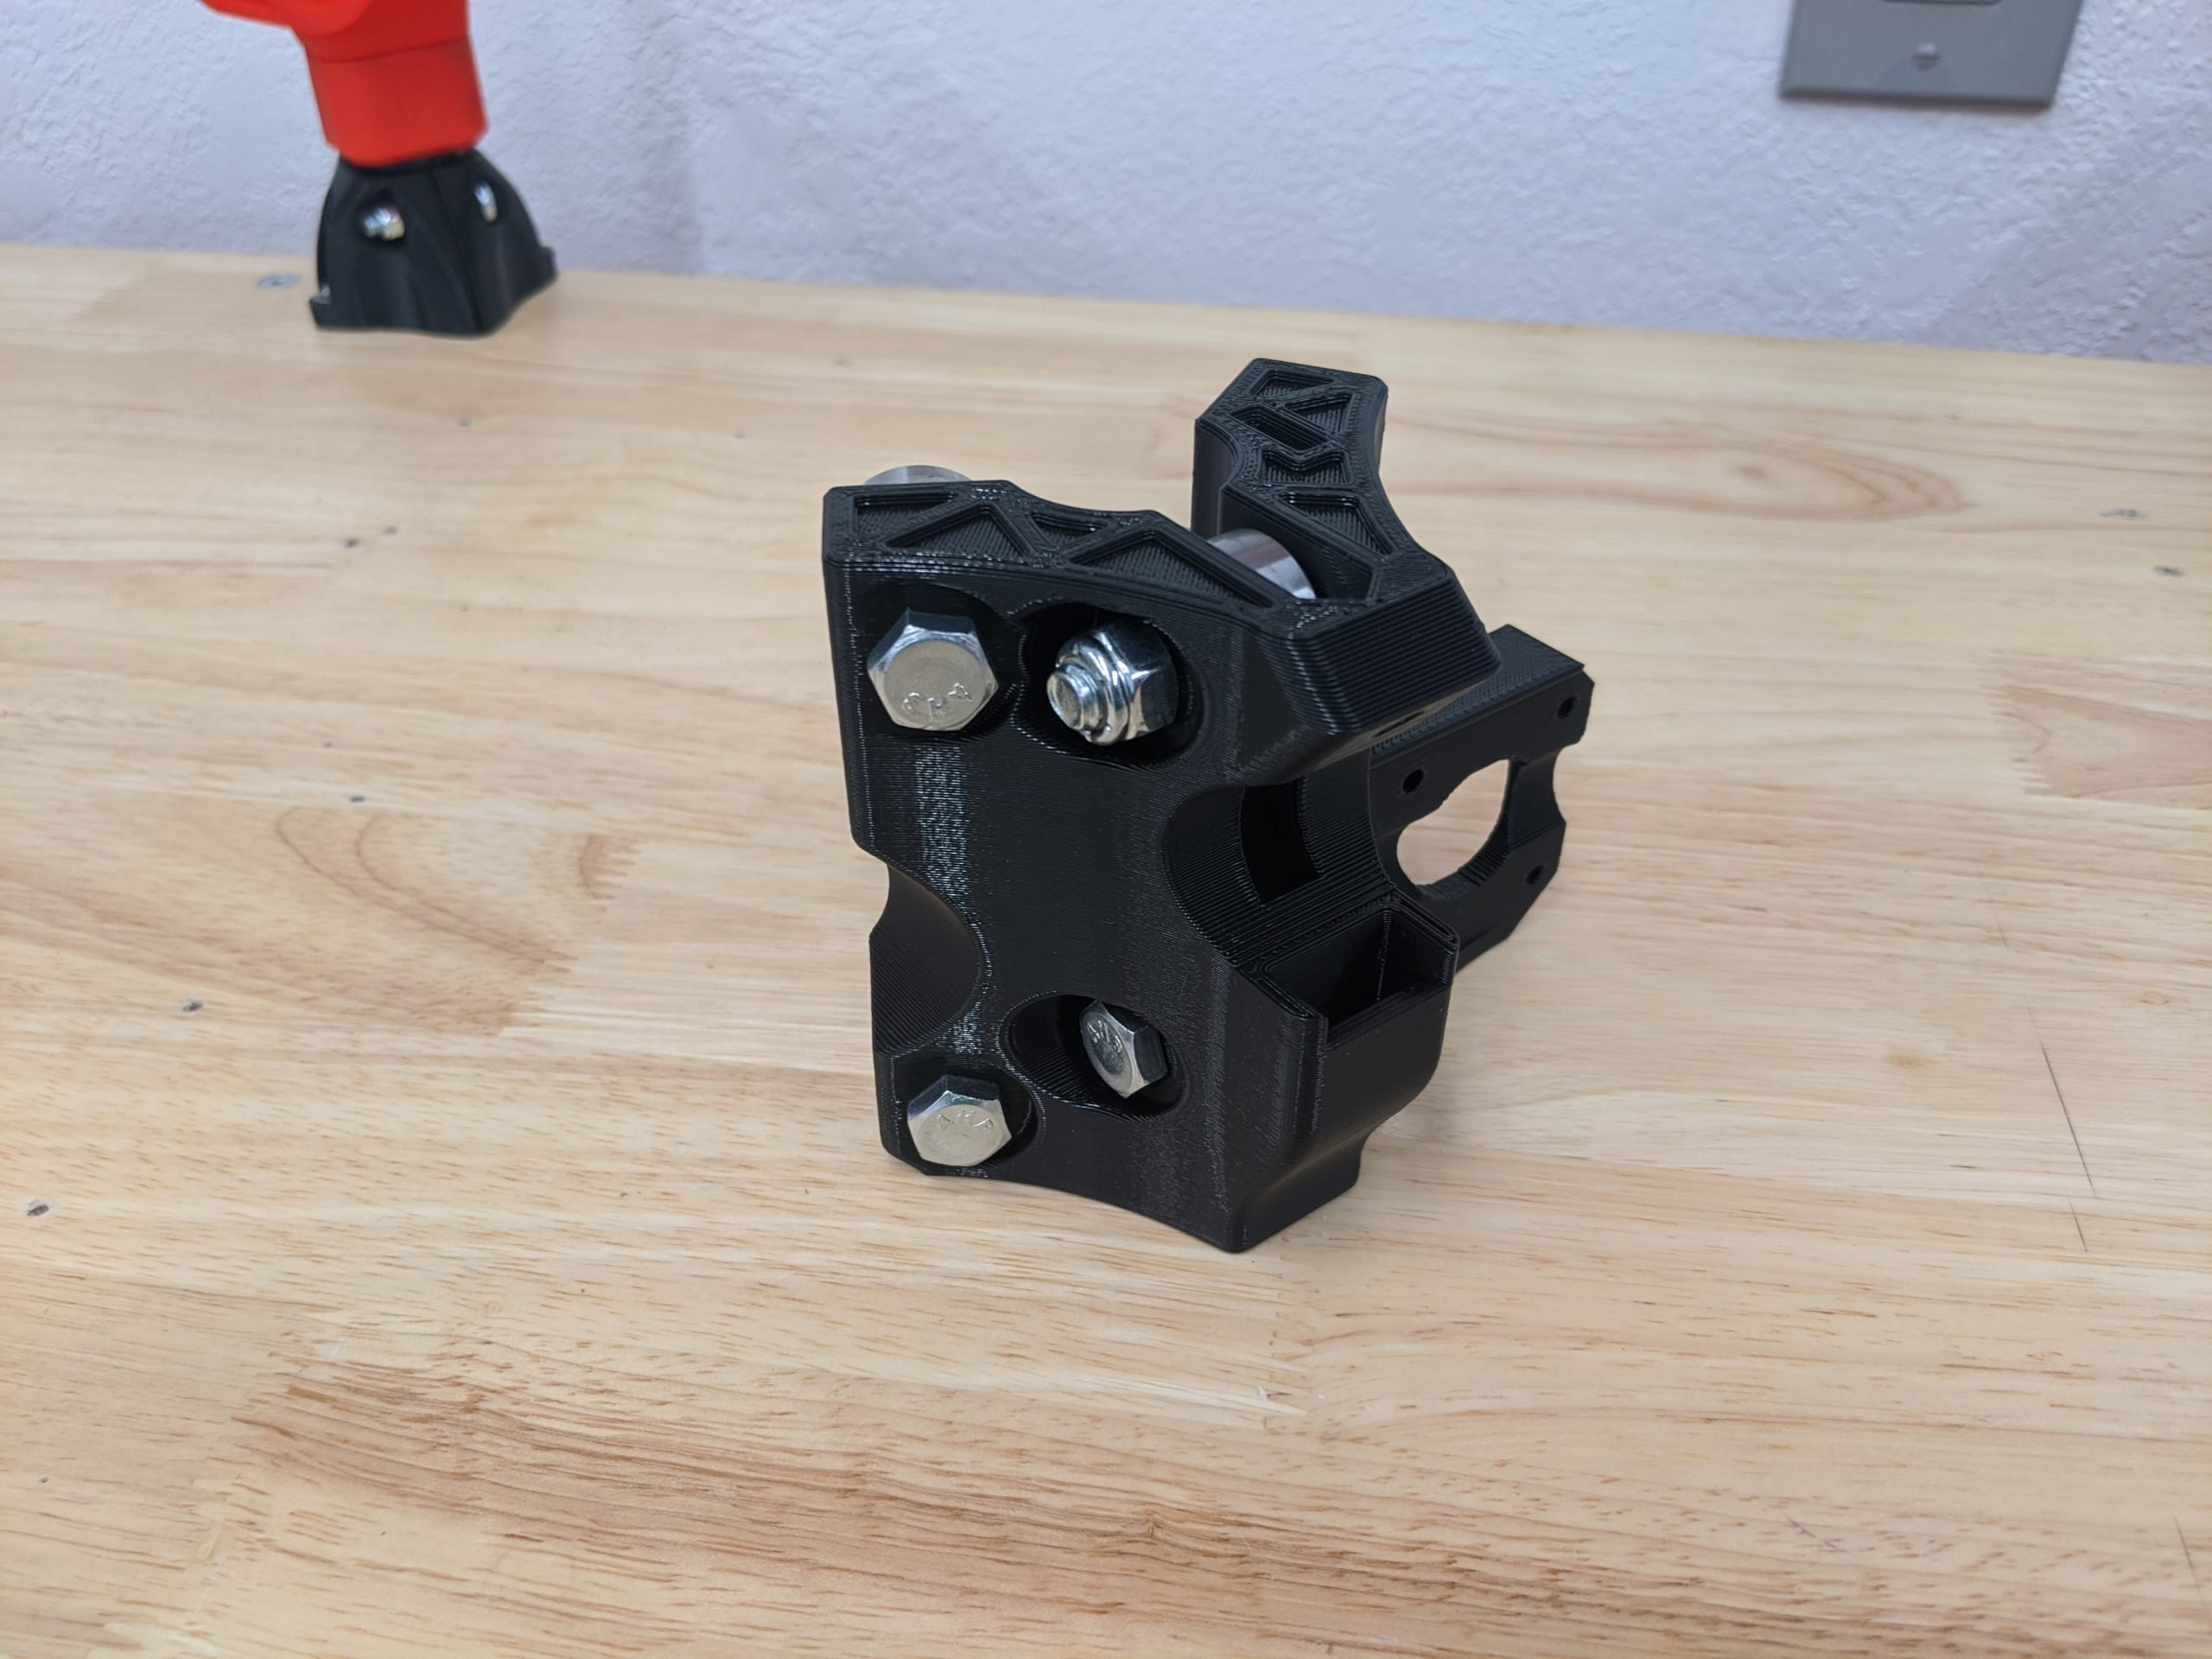
Note
Pay attention to the direction of the bolt heads on these two tension bolts.
Stationary Bearings
- Fit the last 3 bearings and bolt sets.
- Notice the bolt orientation, nuts towards the rails.
- Snug these up. About 7in/lbs.
Caution
Using ratchets makes over tightening the bolts very easy. There are small 1mm built in spacers in the printed parts, if you crush these you are about 3x too tight. Loose is better than tight. If you work on your own car it is wayyyyyy less that any bolt you have ever tightened.
Set The Truck Tension
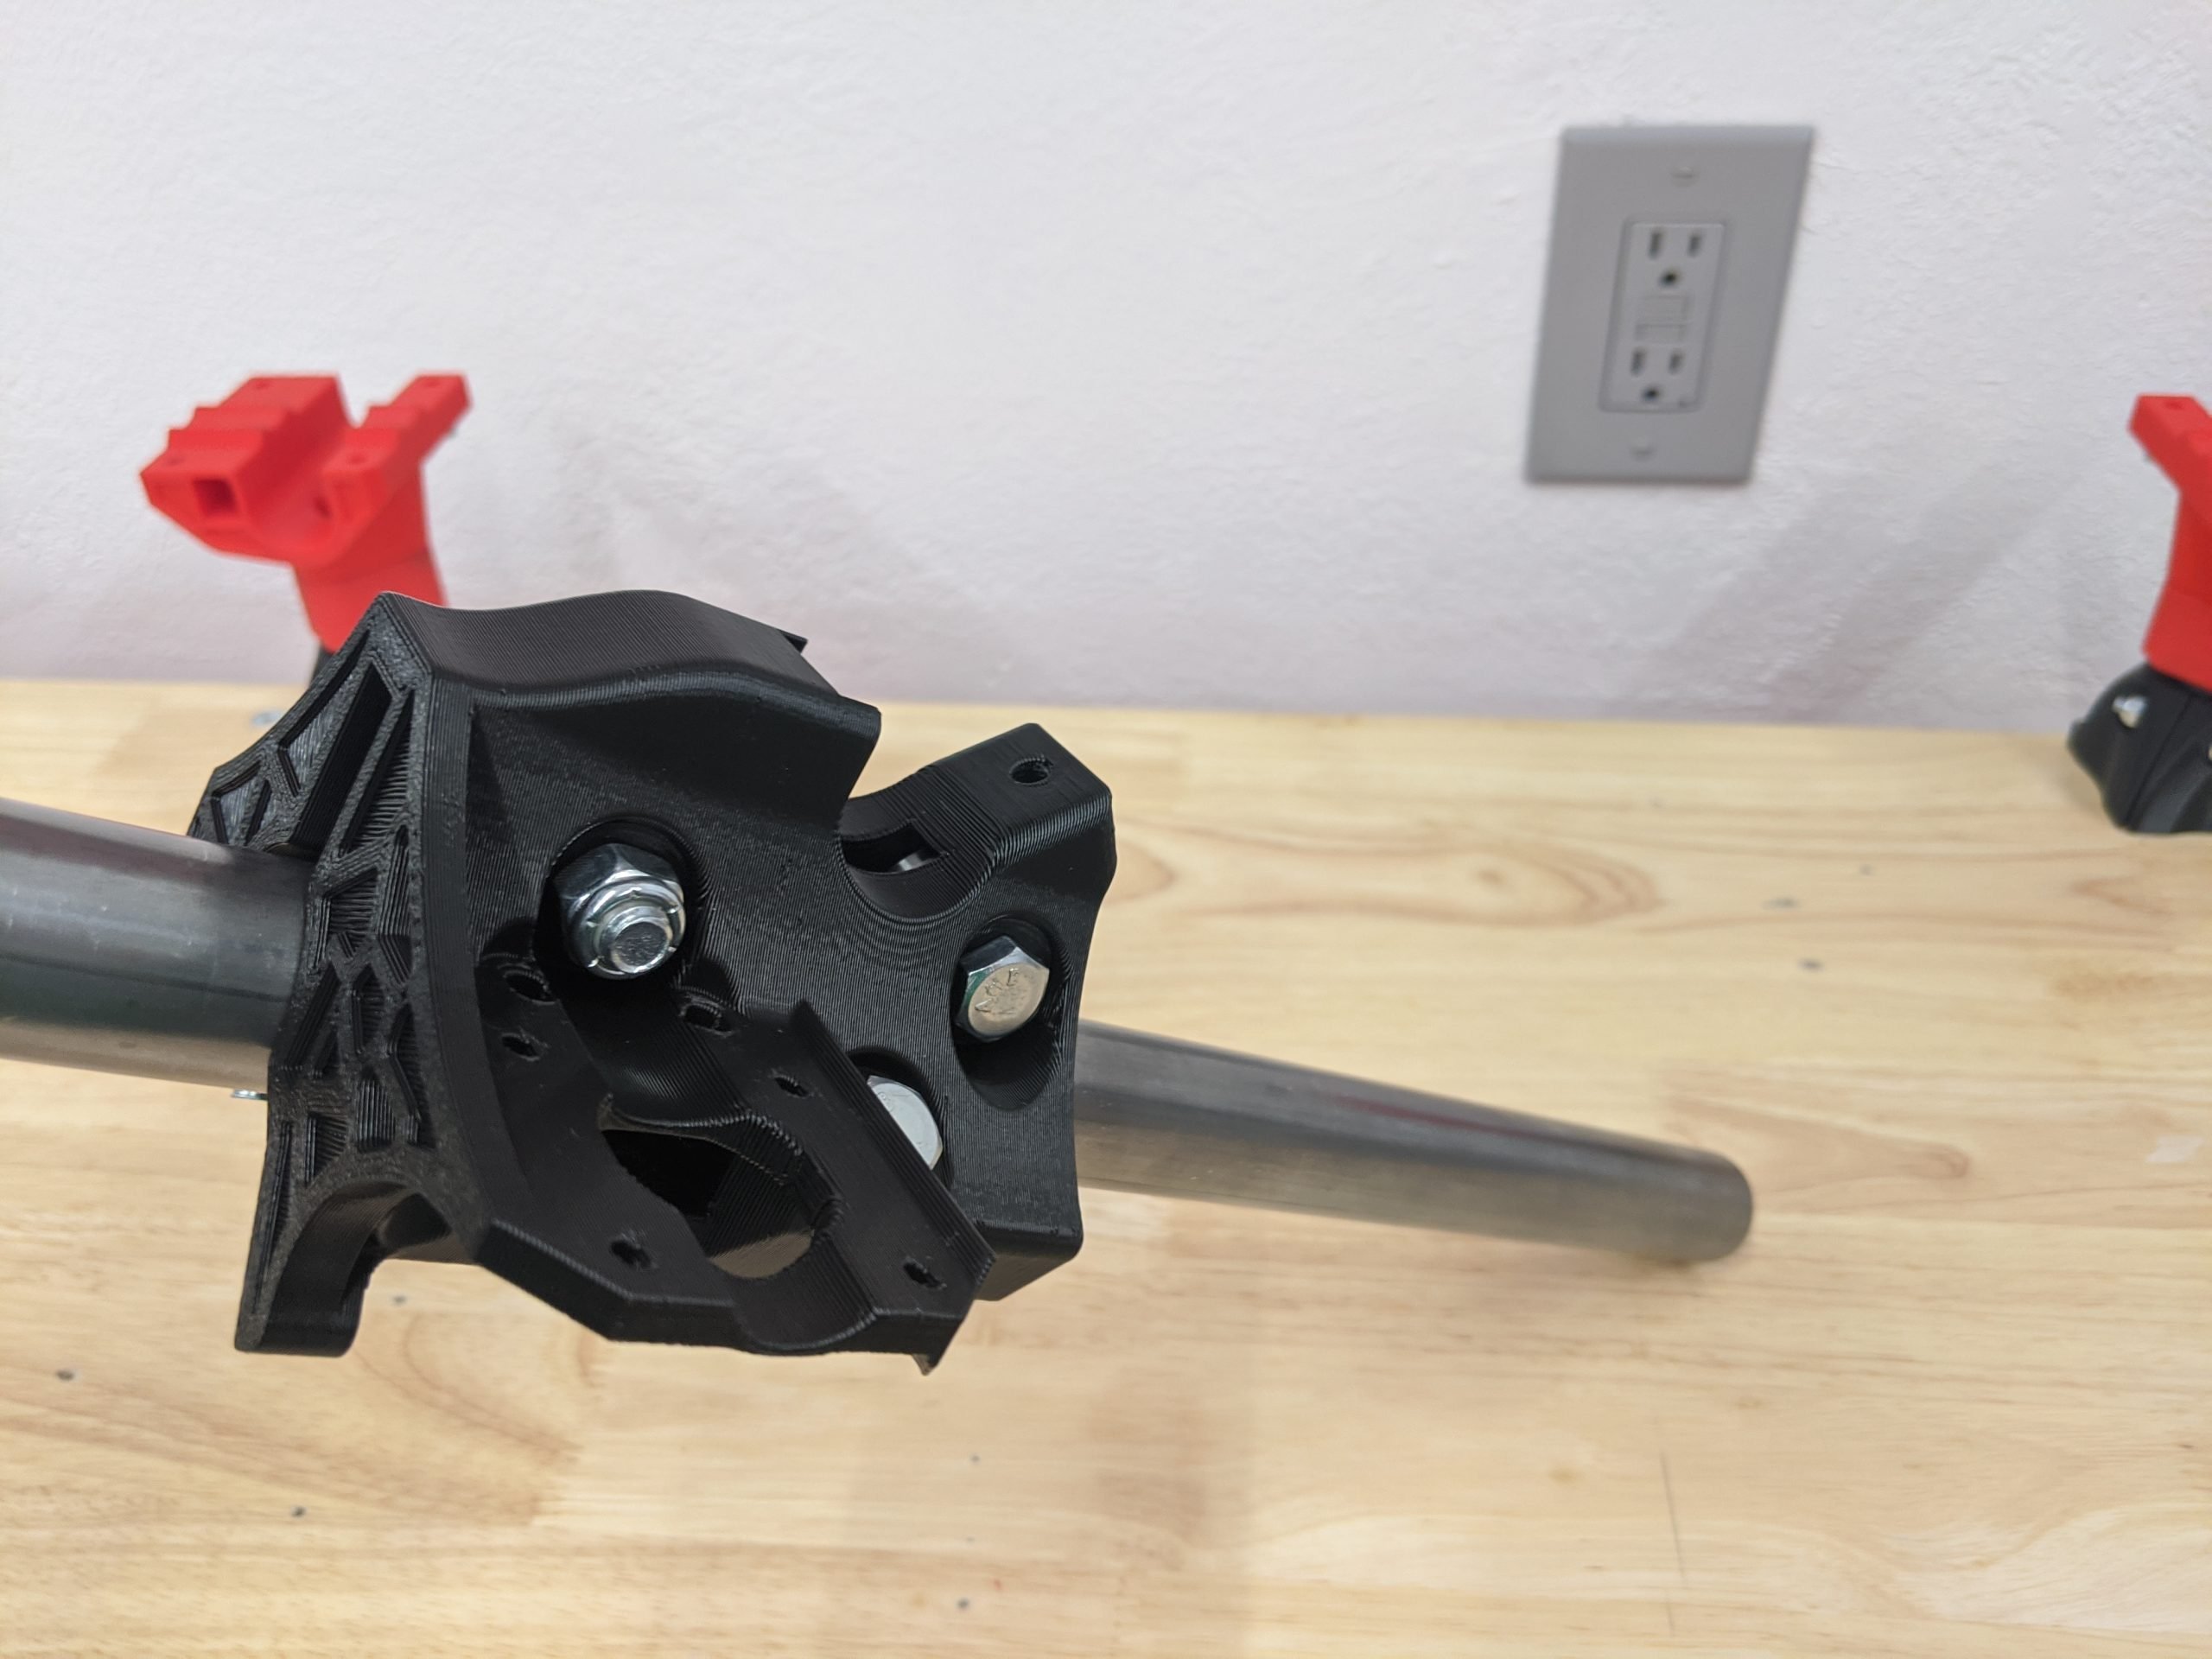
- Insert a rail into the Truck.
- You are looking for all bearings to make contact and just a hint of tension. If you tip the rail at a 45 degree angle the Trucks should slowly move. Too tight and they will stay, too loose and they will drop right off.
- Tension both bolts evenly - for a new print this should actually just be good with no extra tension needed. If this is the case, just snug up the tension bolts until the heads and nuts are touching the plastic. Holding not adding to the current tension.
Caution
If you have to really torque down on these bolts you could have the wrong sized rails or parts. The same thing applies if they are too tight, although you can let them sit overnight with no tension on the bolts to see if they loosen up a bit.
Truck Clamp
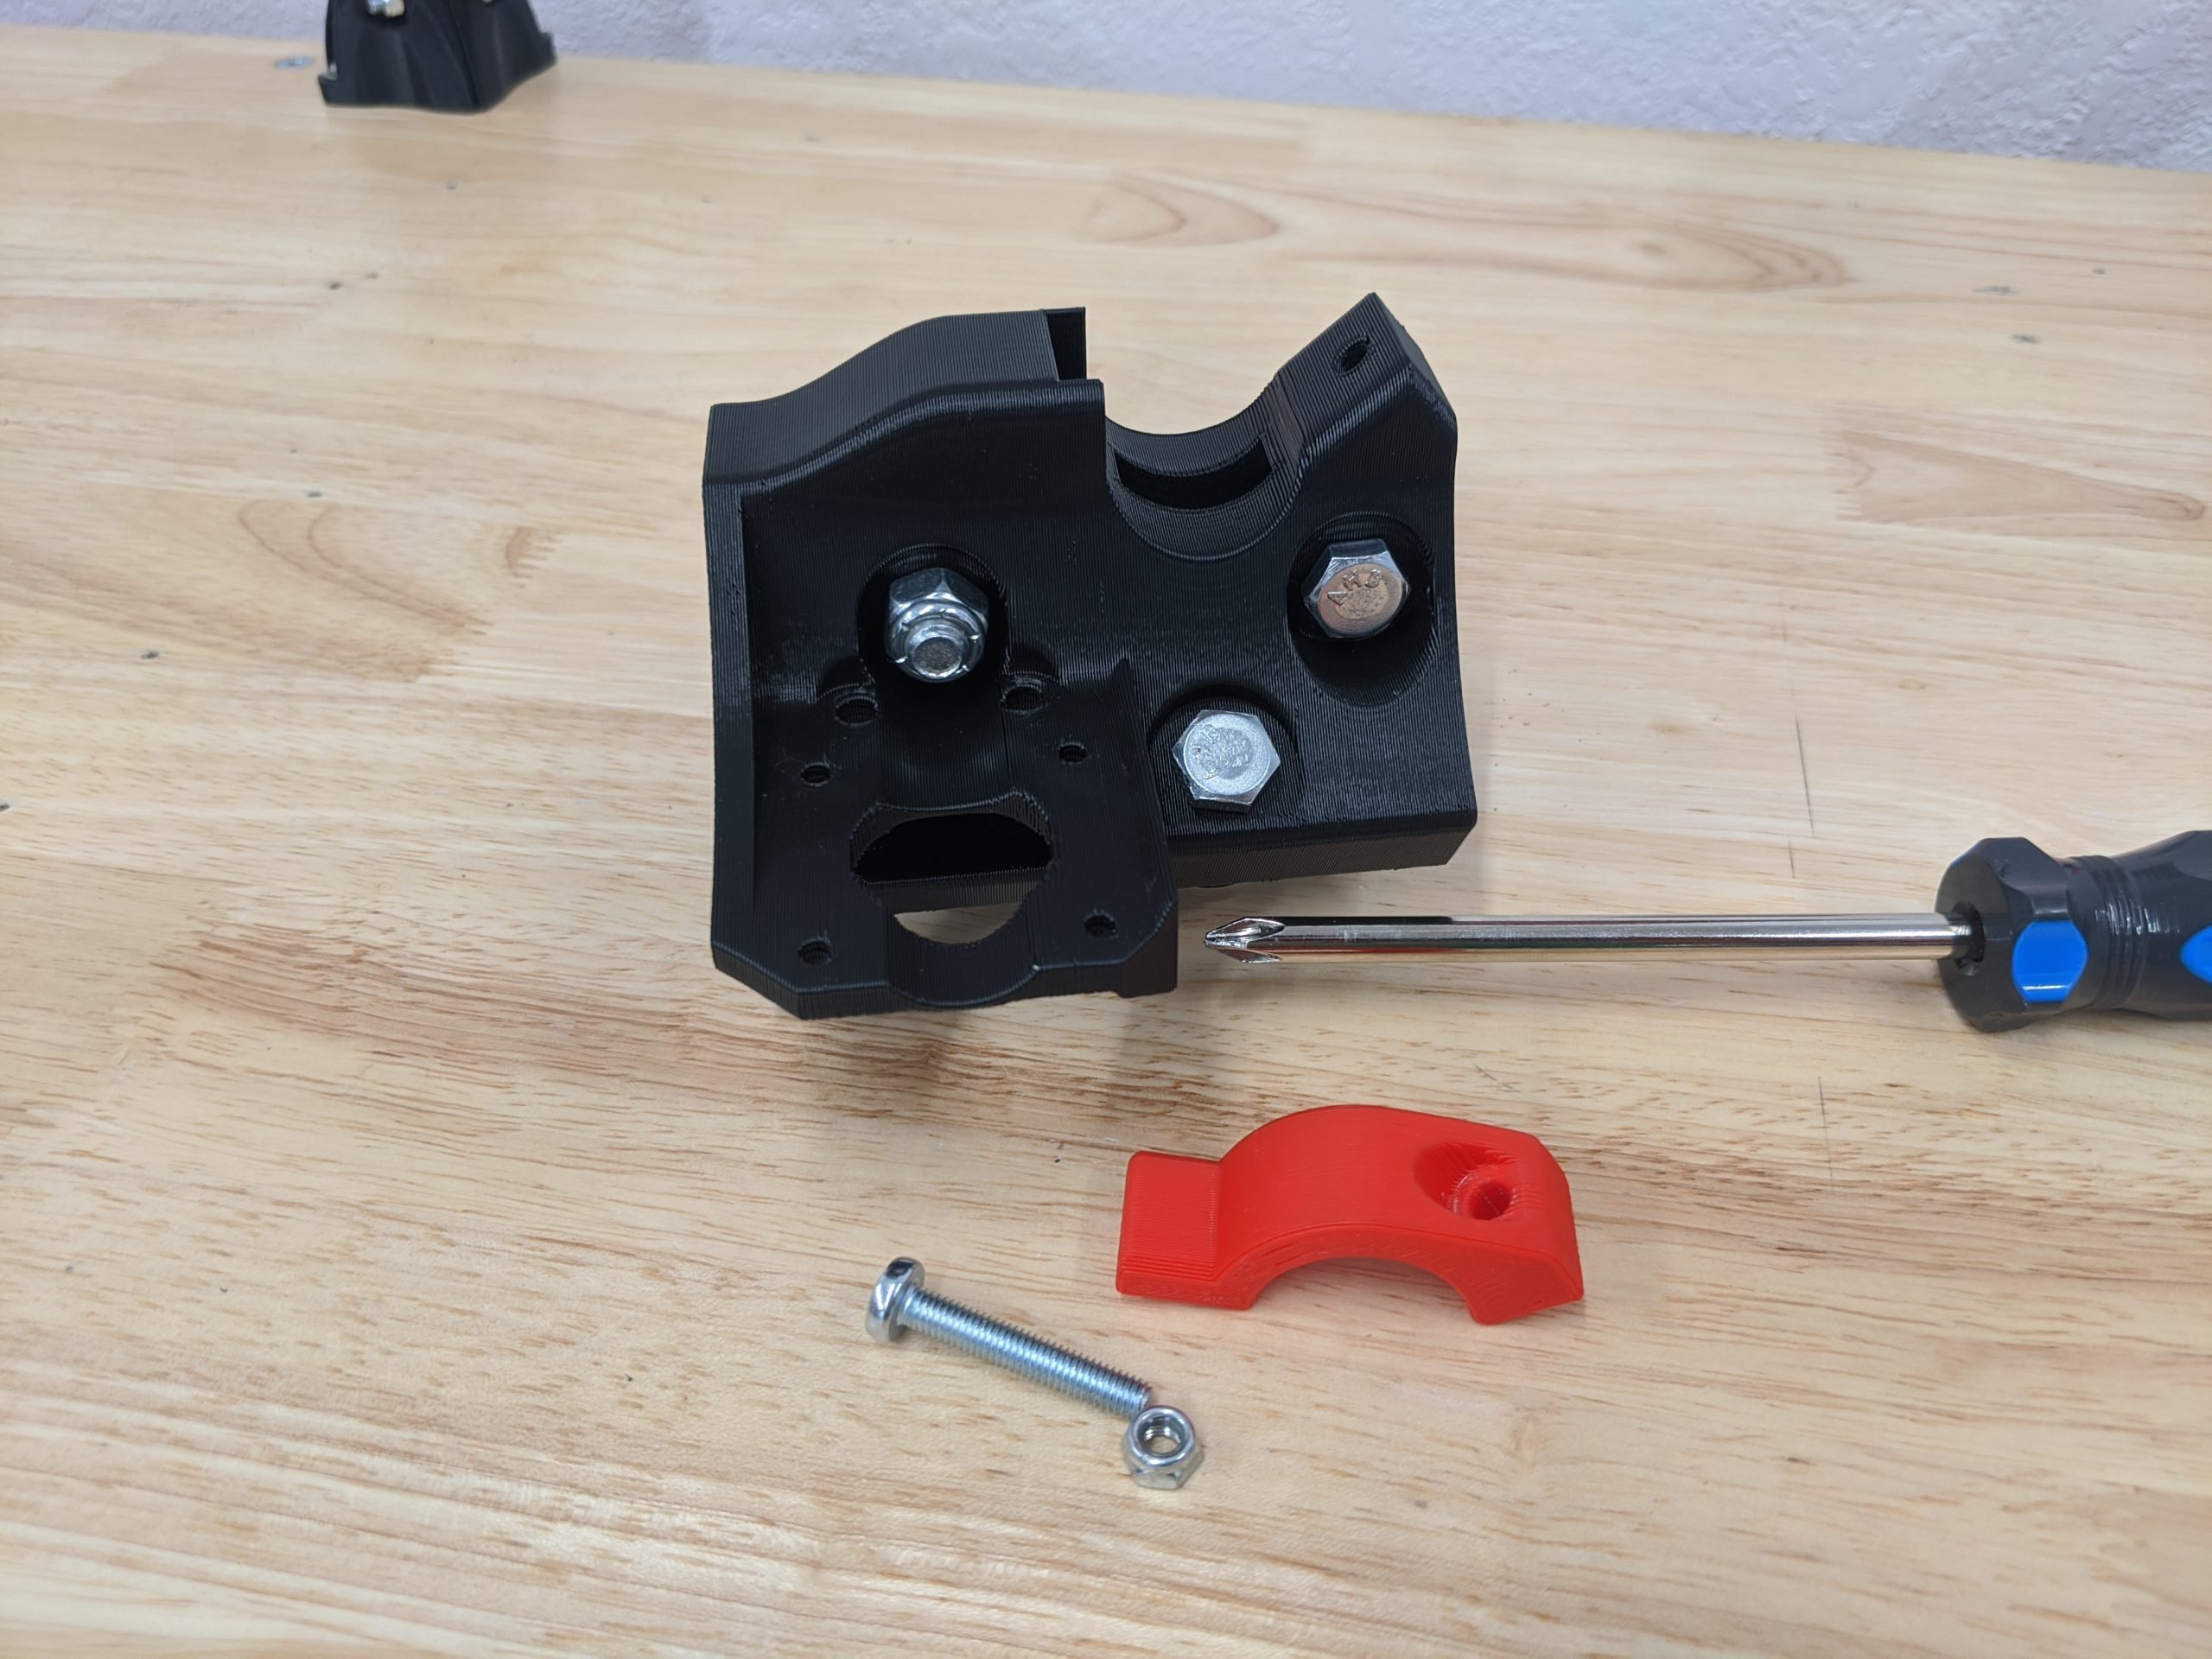
- You will need the printed Truck Clamps.
- M5 x 30mm screw and locknut.
- #2 screwdriver.
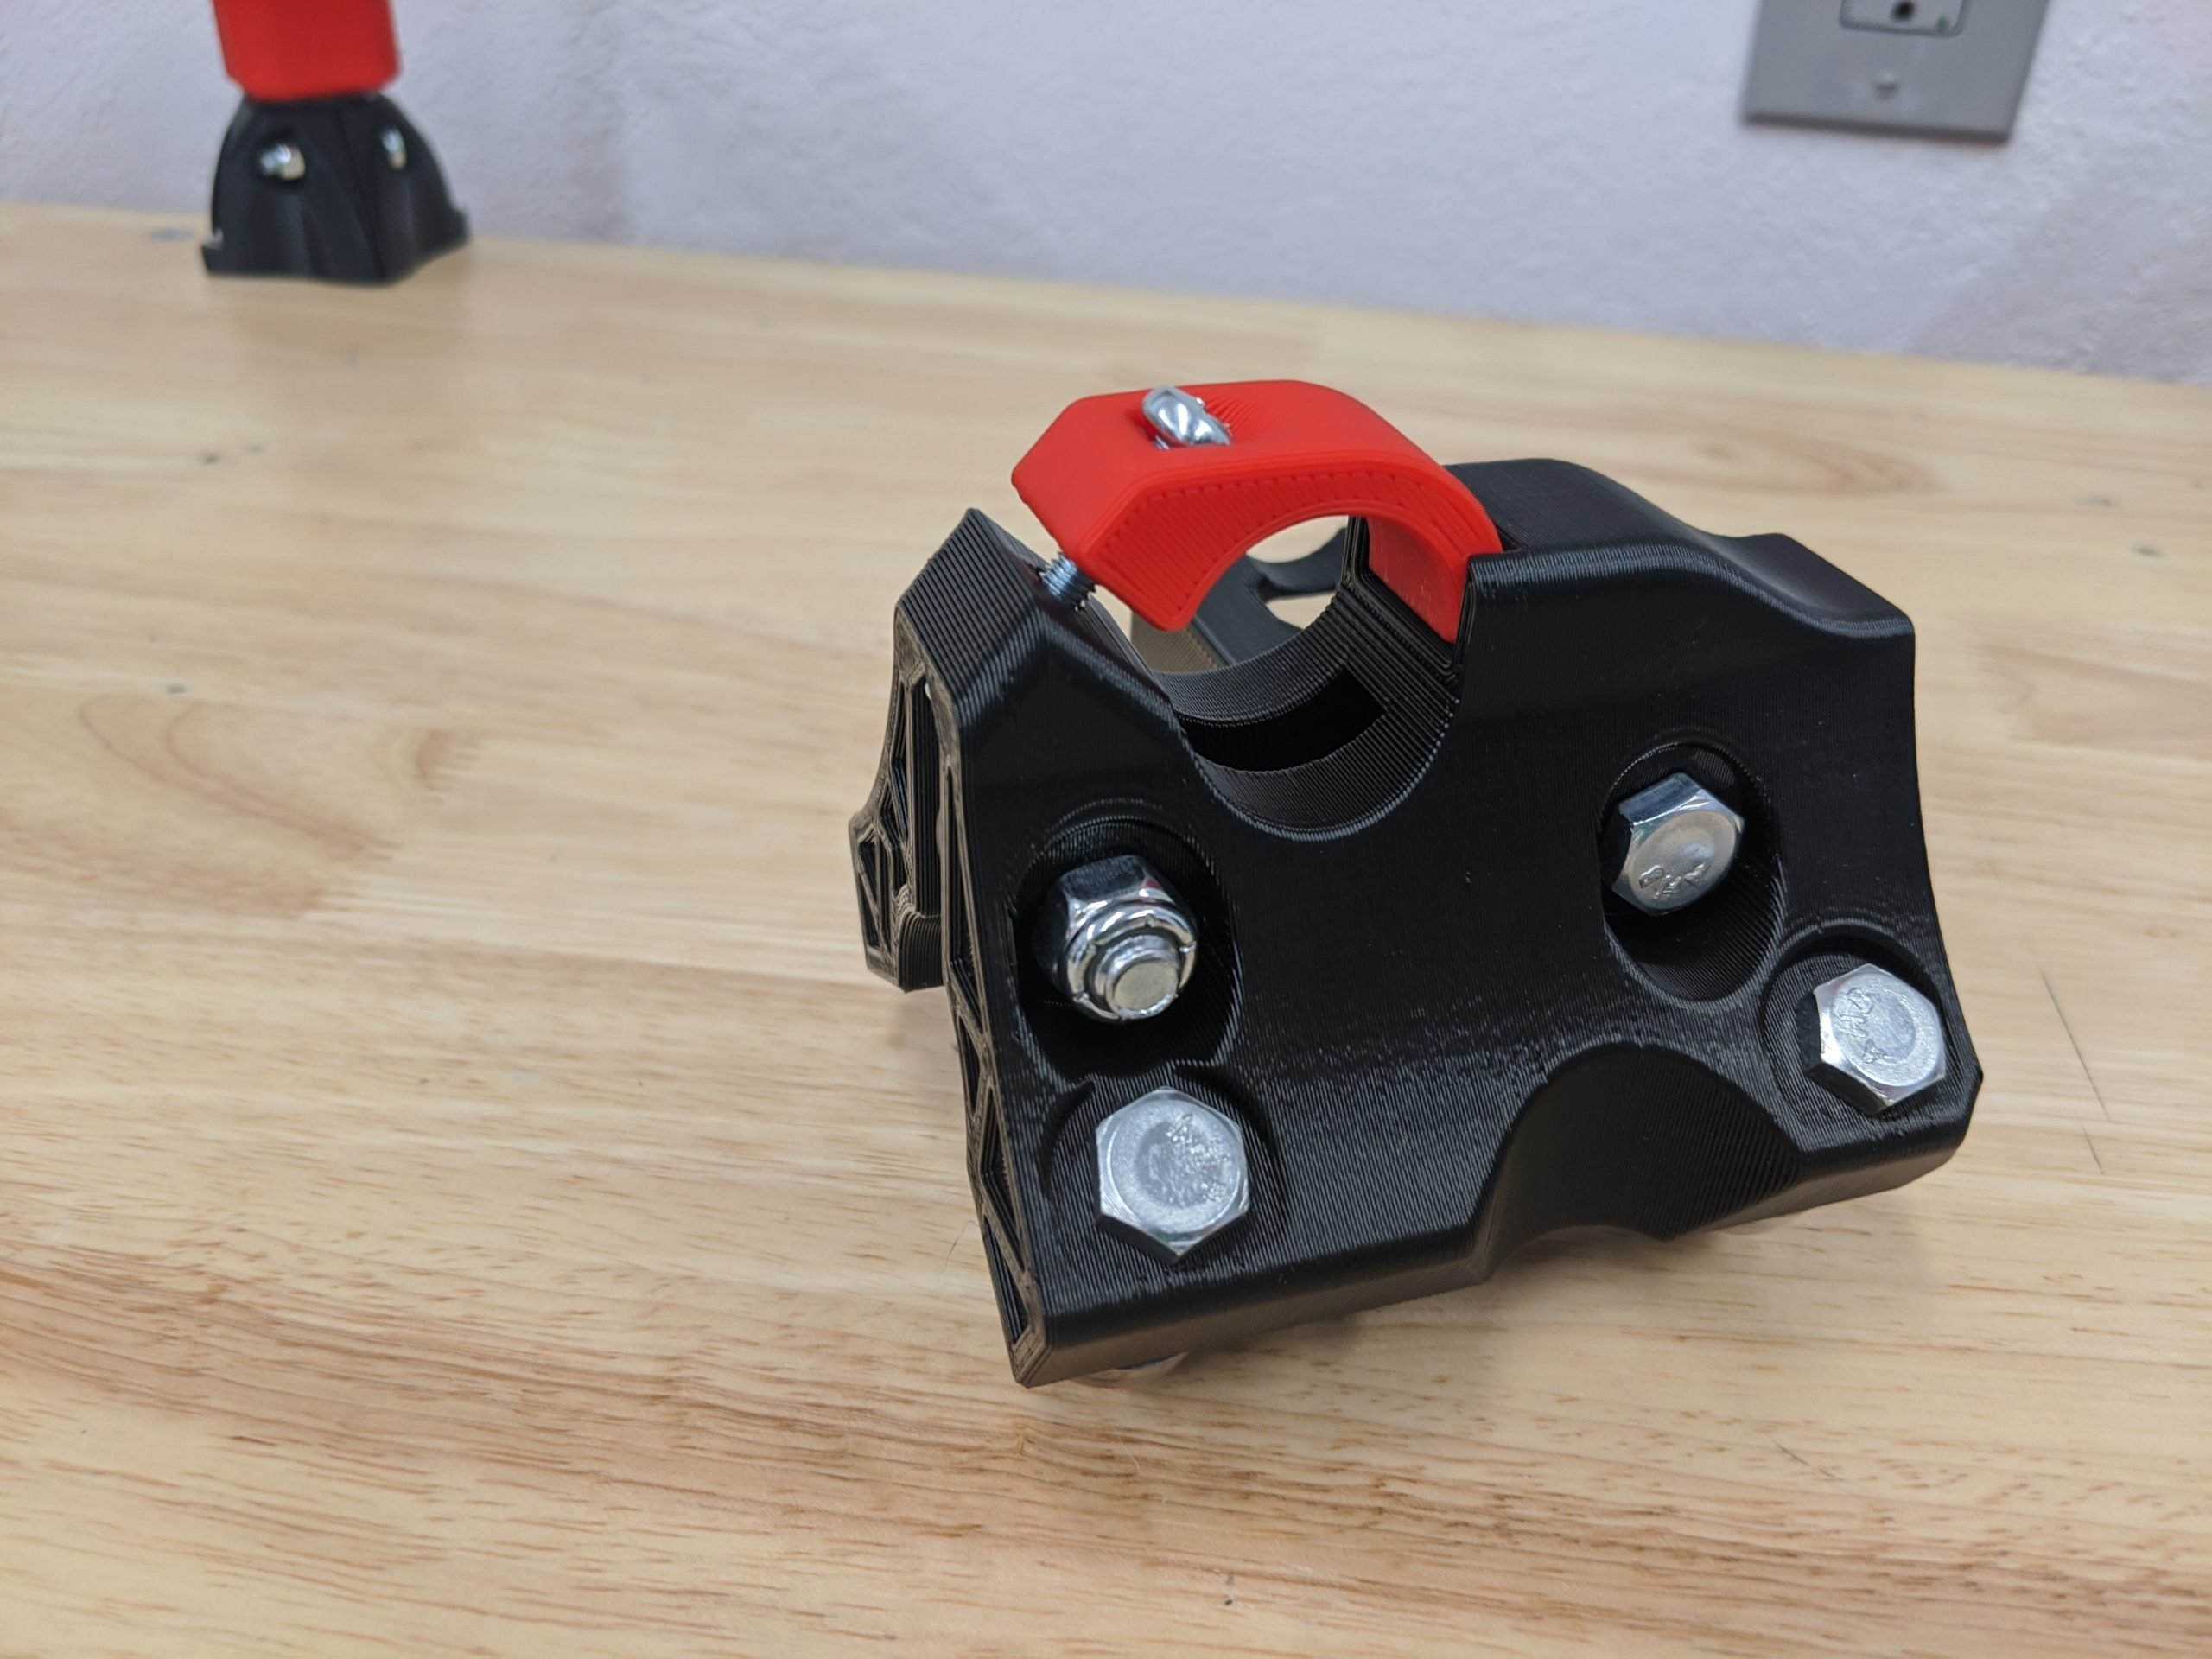
- Leave these loose, just engaging the nylocks. The rail will be added later.
Tip
For all the screws with captured nuts it is best to pre-thread them to loosen them up a bit to prevent ruining the printed parts.
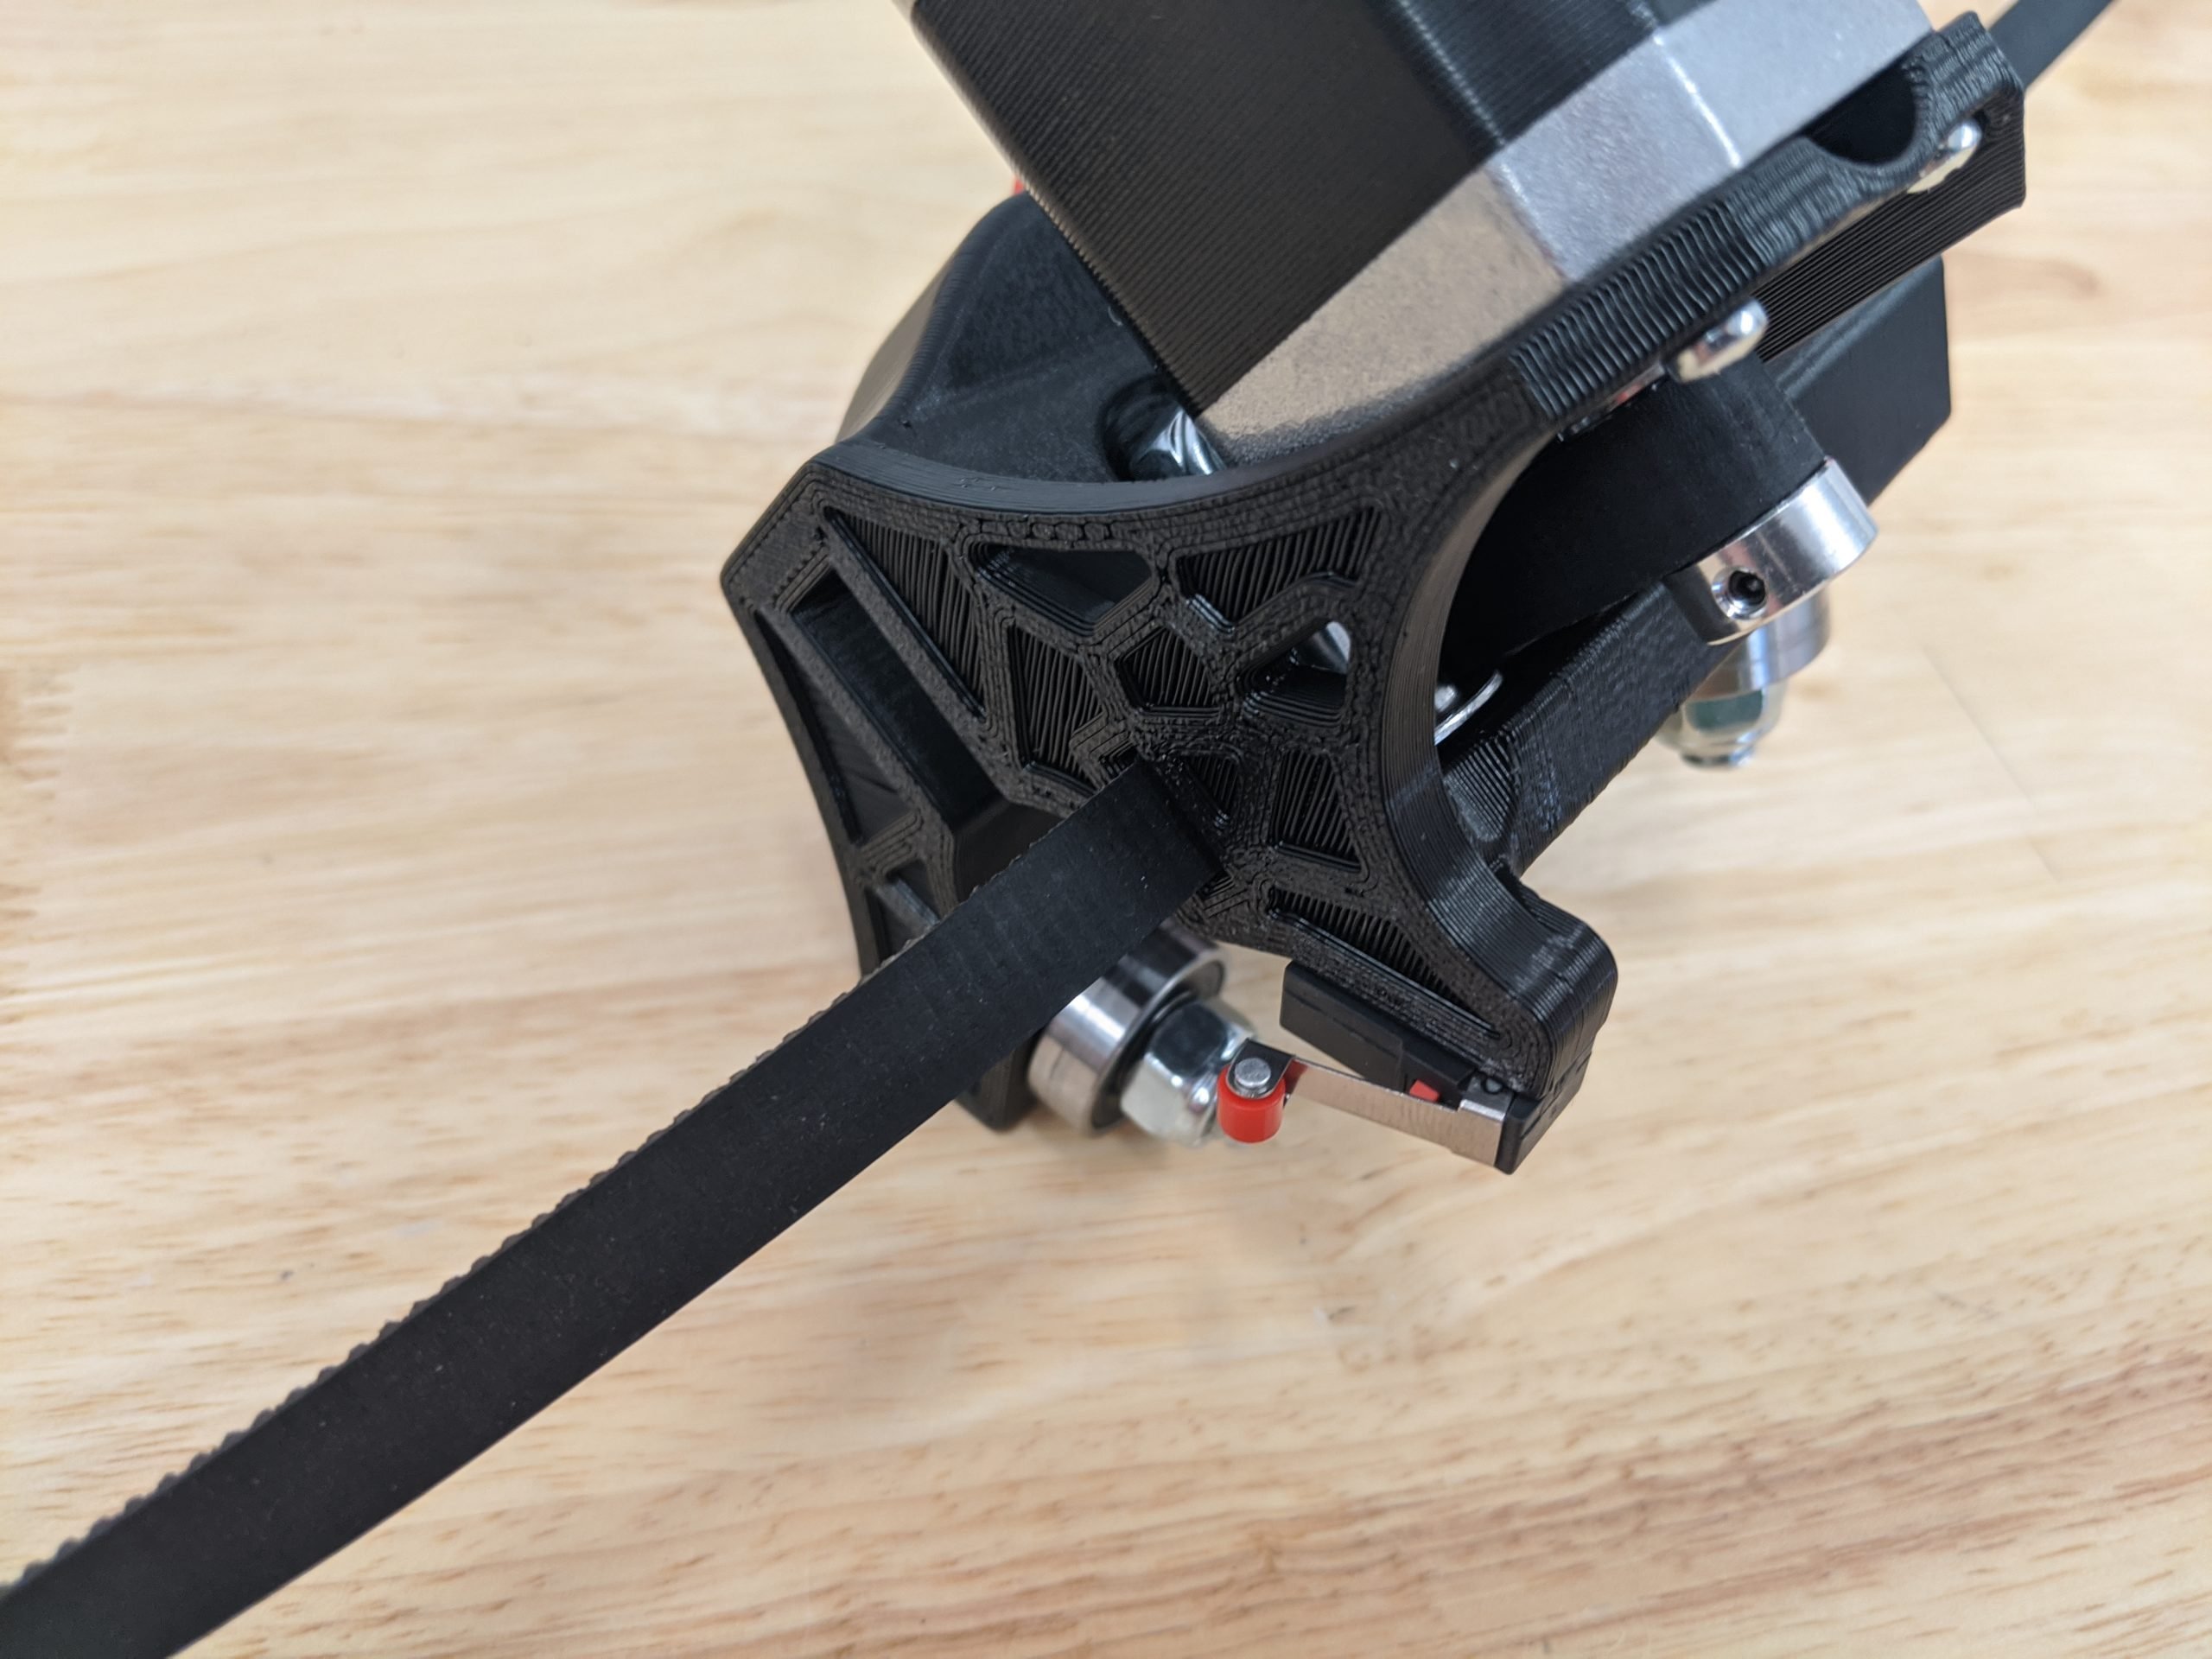
Belts and Idlers
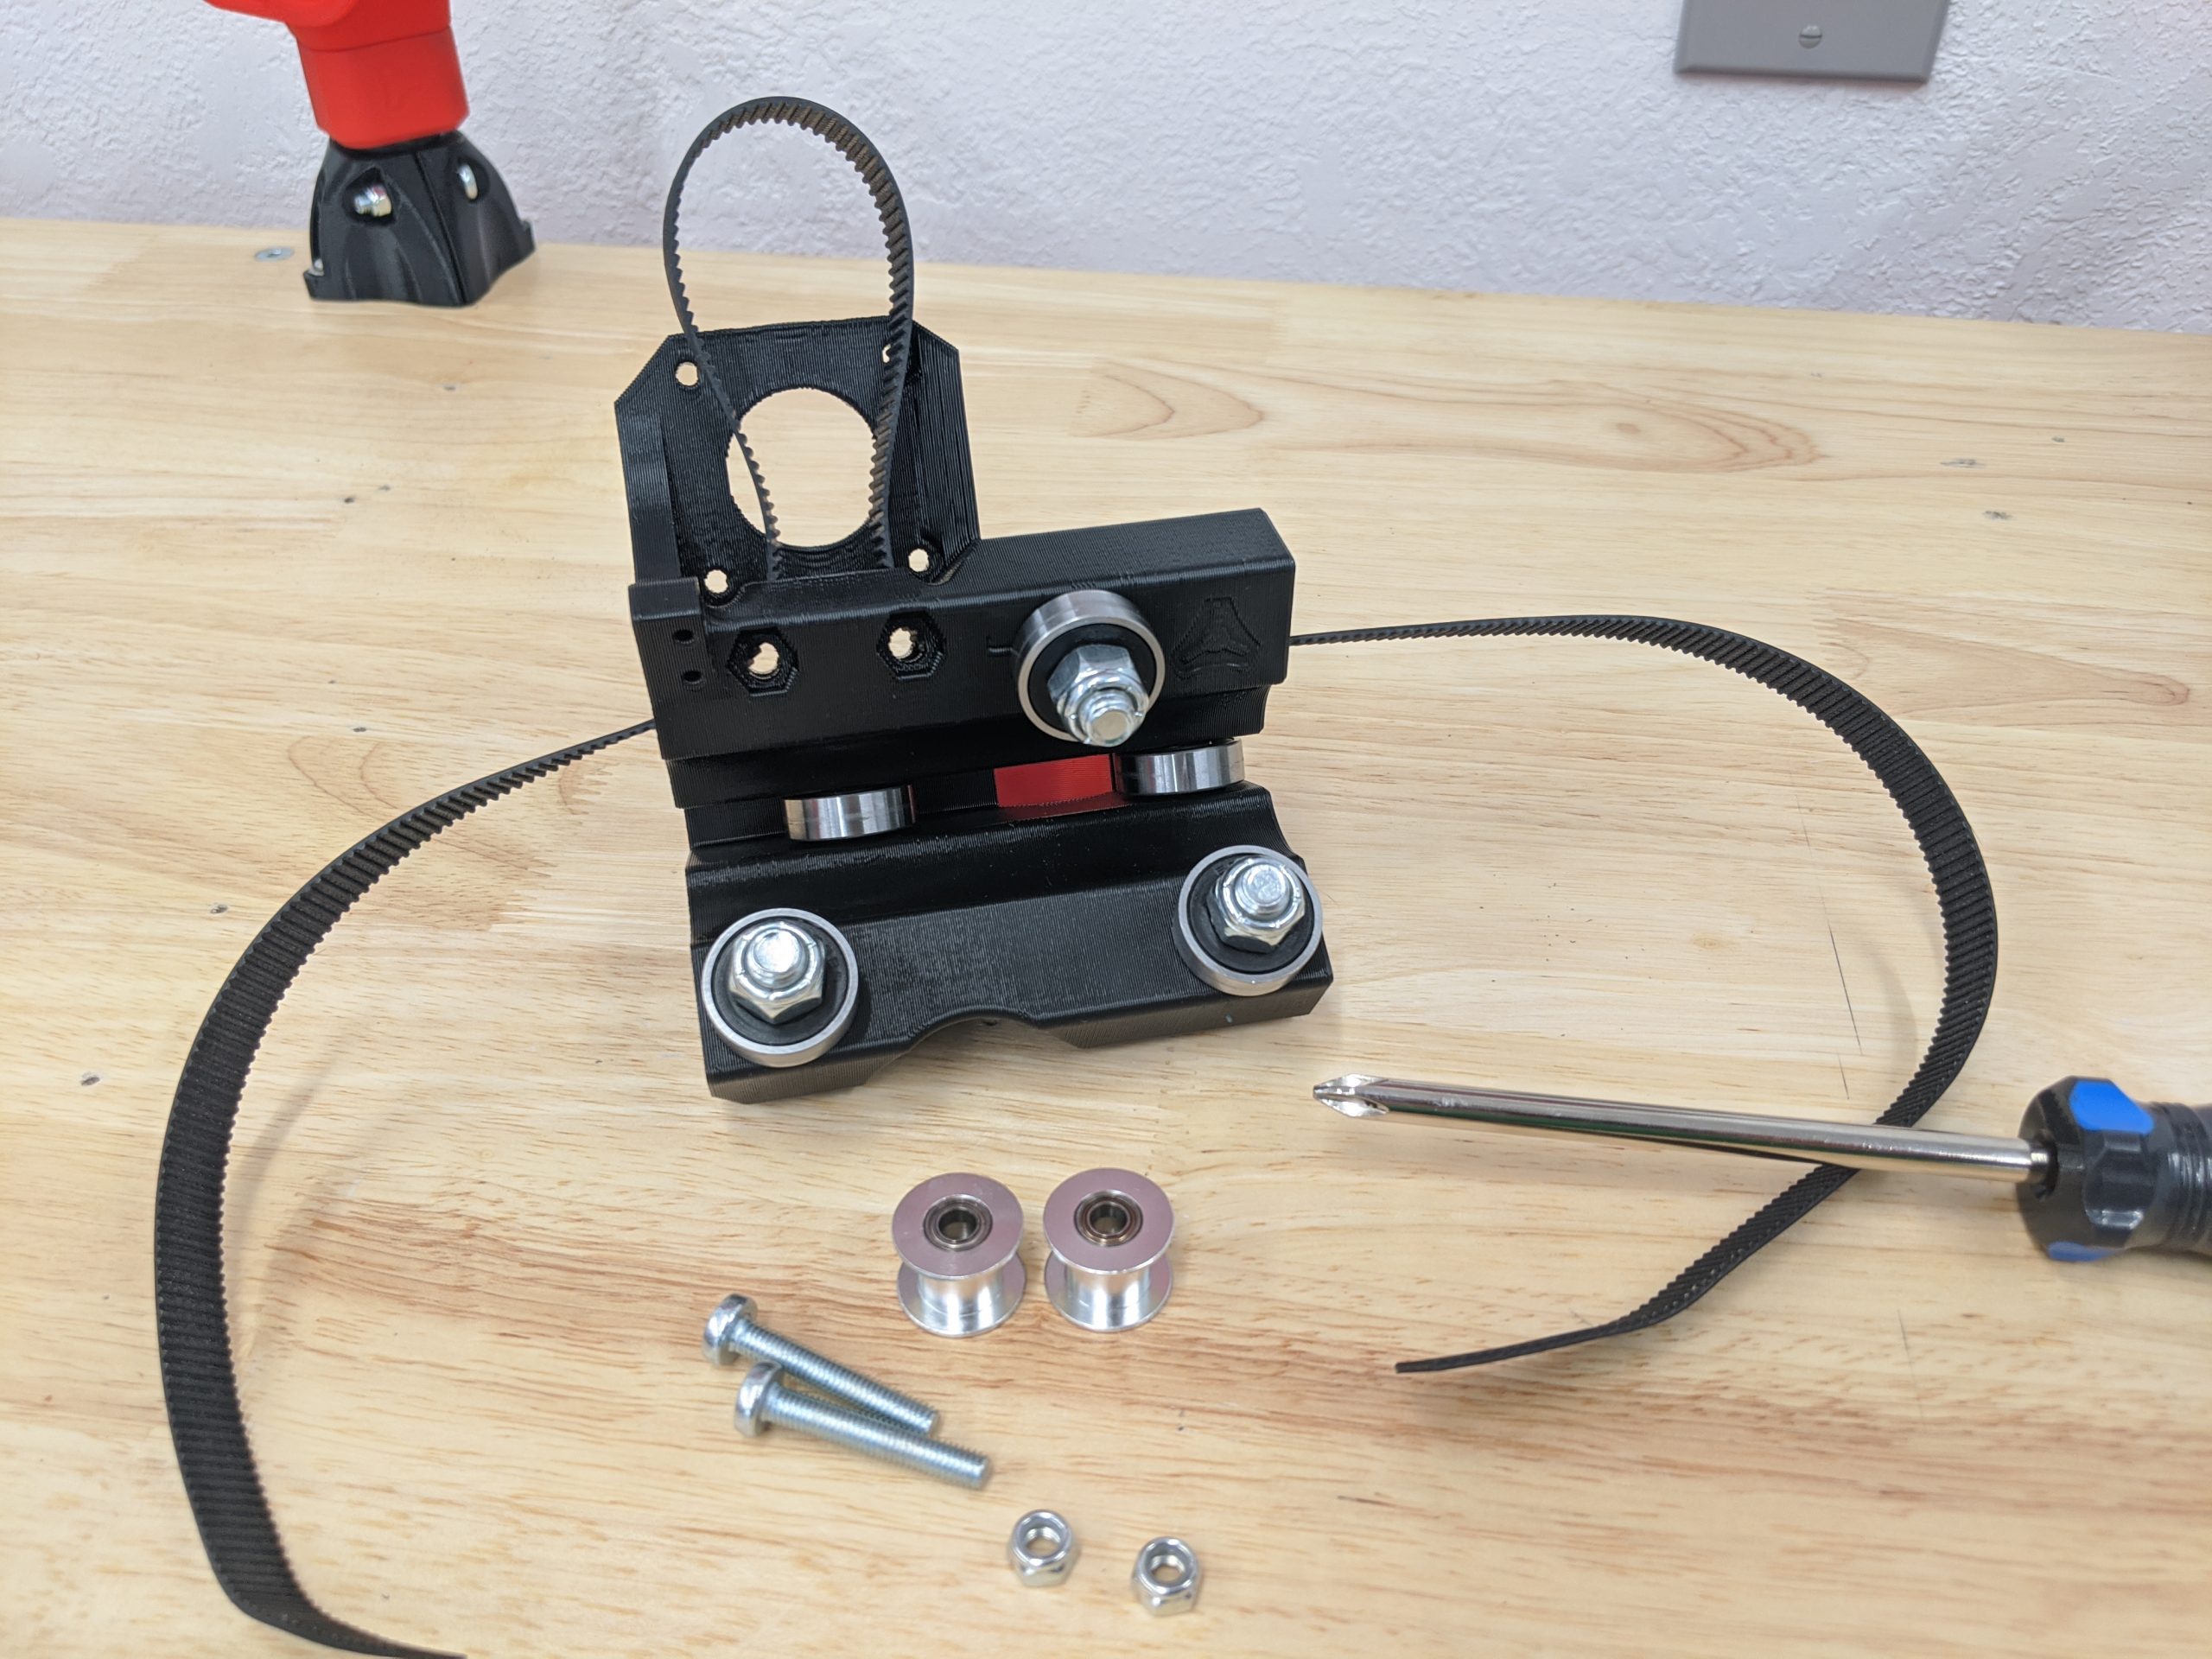
- You will need two idlers for each Truck.
- Two M5 screws and nuts.
- #2 screwdriver.
Tip
If you add the belts first it is easier than trying to fish them through later. Each axis has a mirrored set of Trucks, so that is an easy way to also pair up the belts.
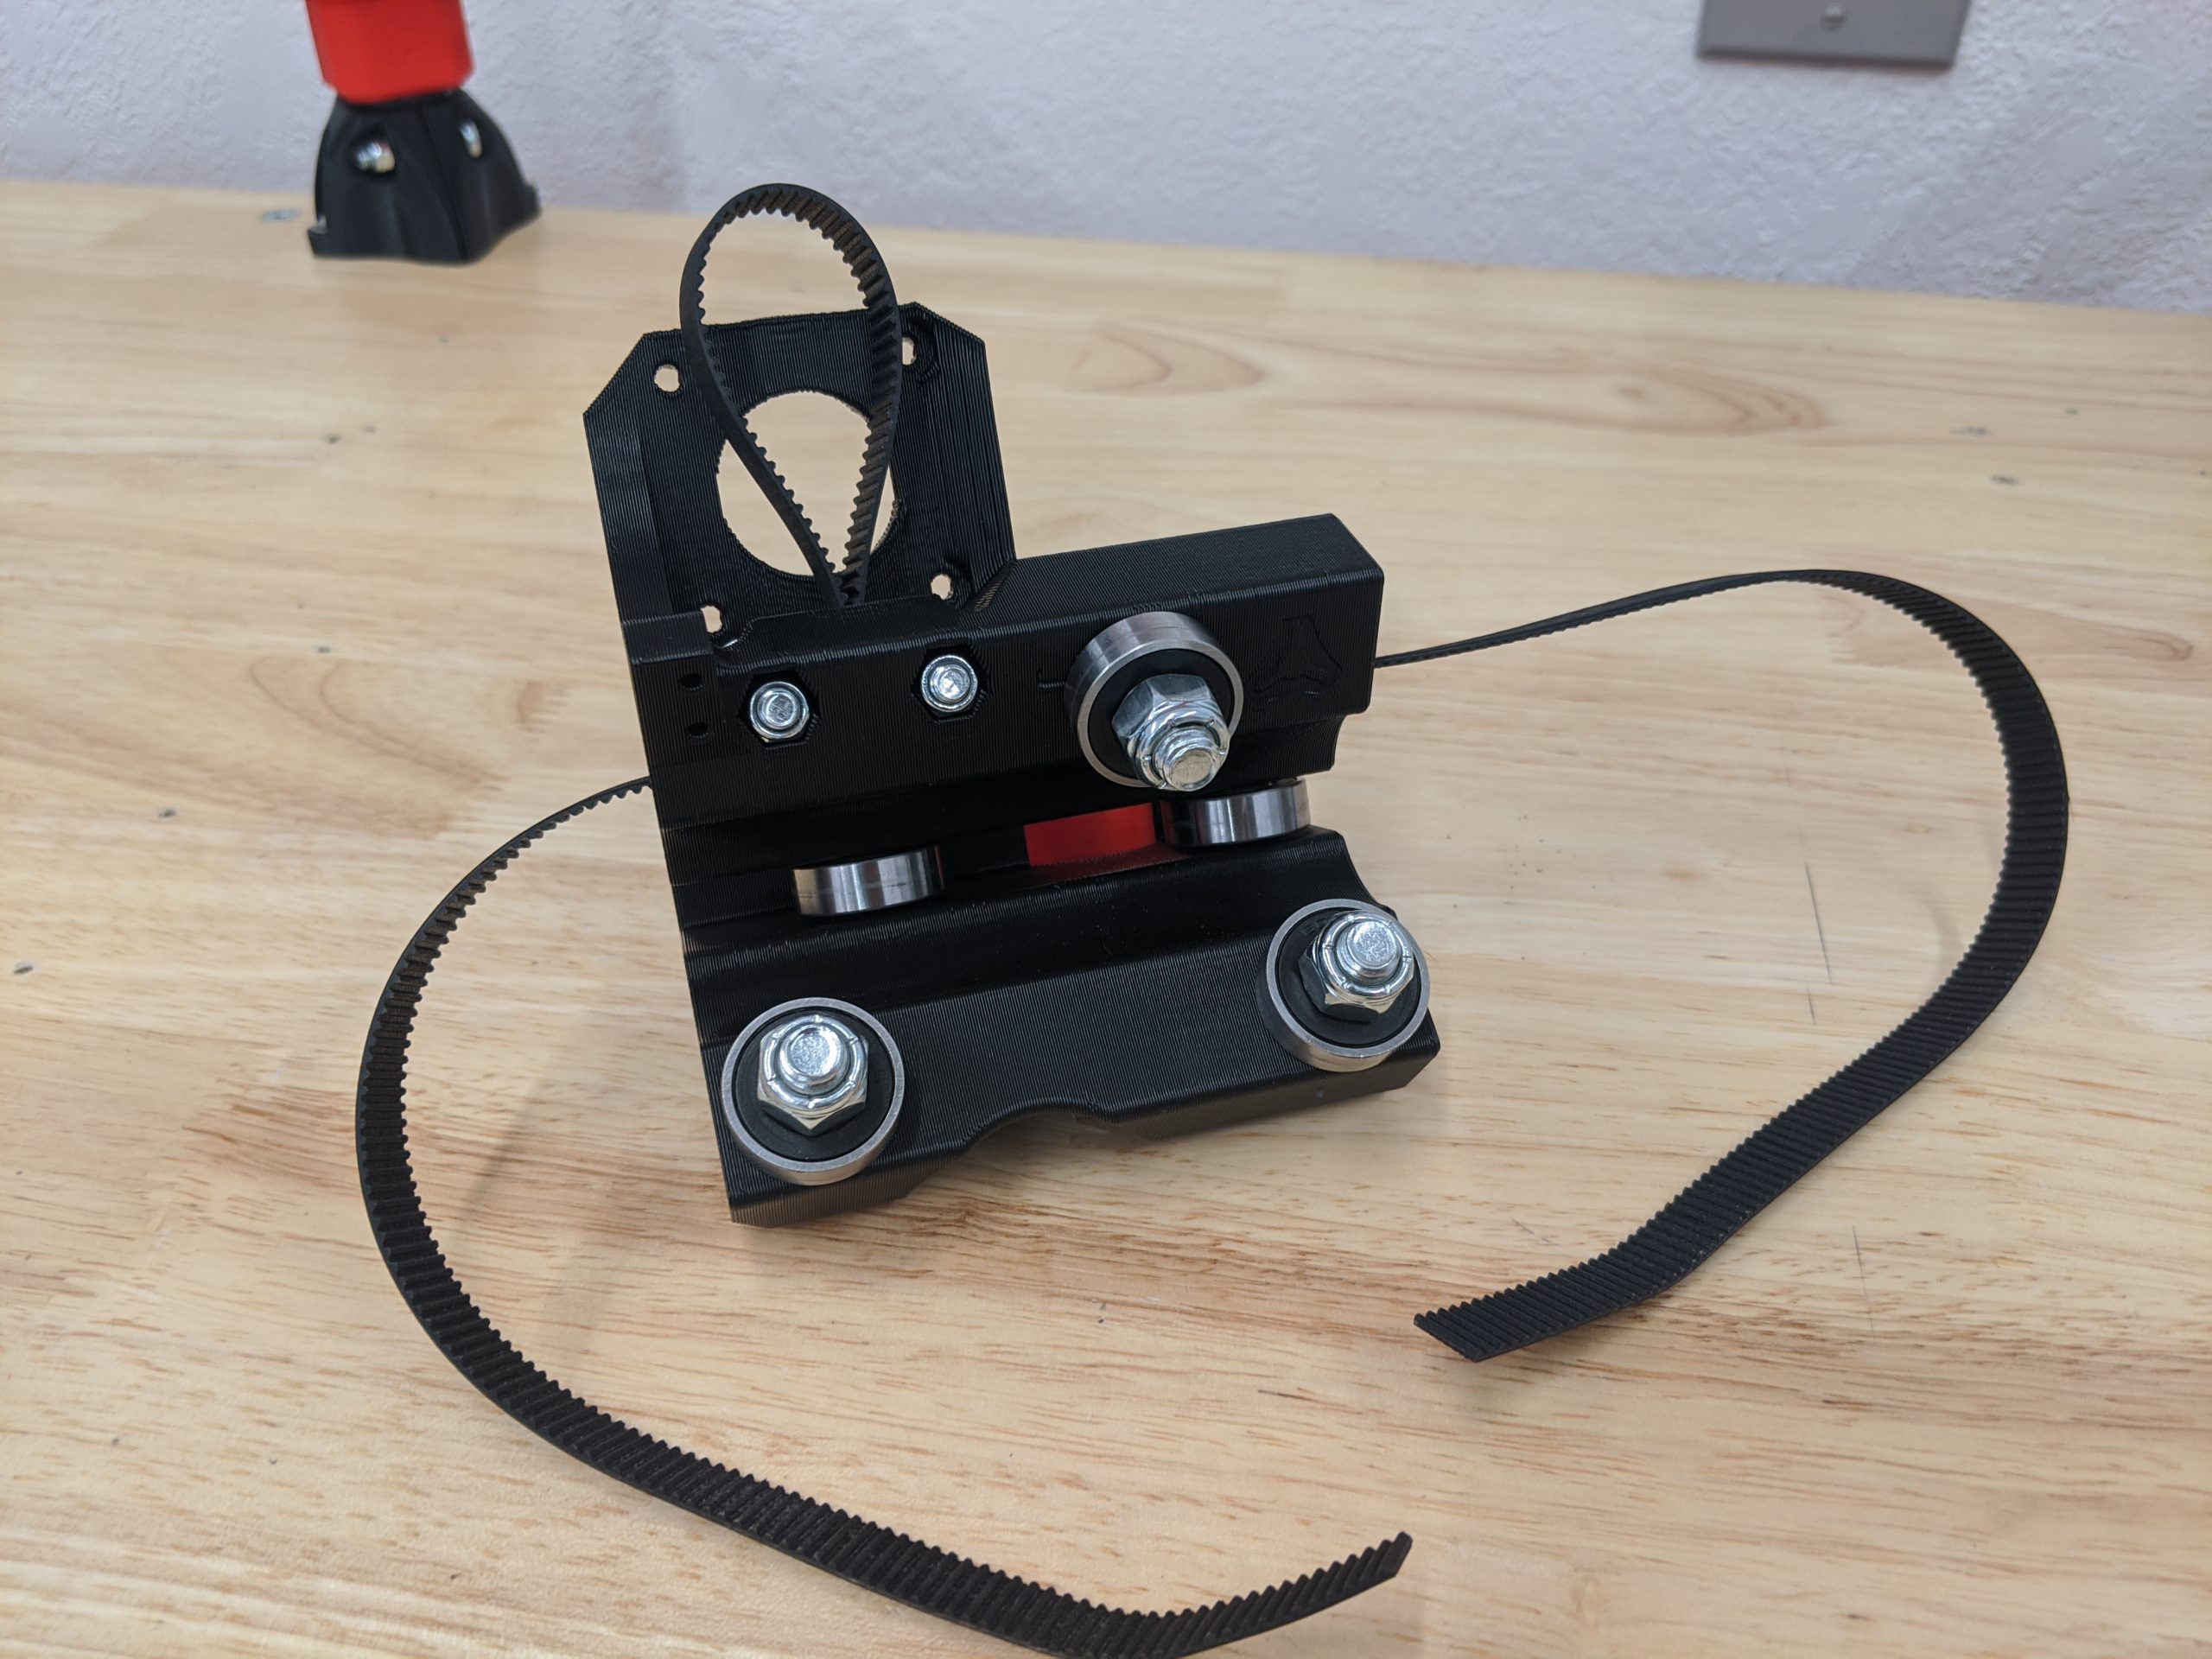
- Tuck in the idlers into the pocket in the Trucks.
- Tighten the screws just tight enough to seat the nut all the way then back off a ½ turn.
- Ensure the idlers are free spinning.
Pulleys
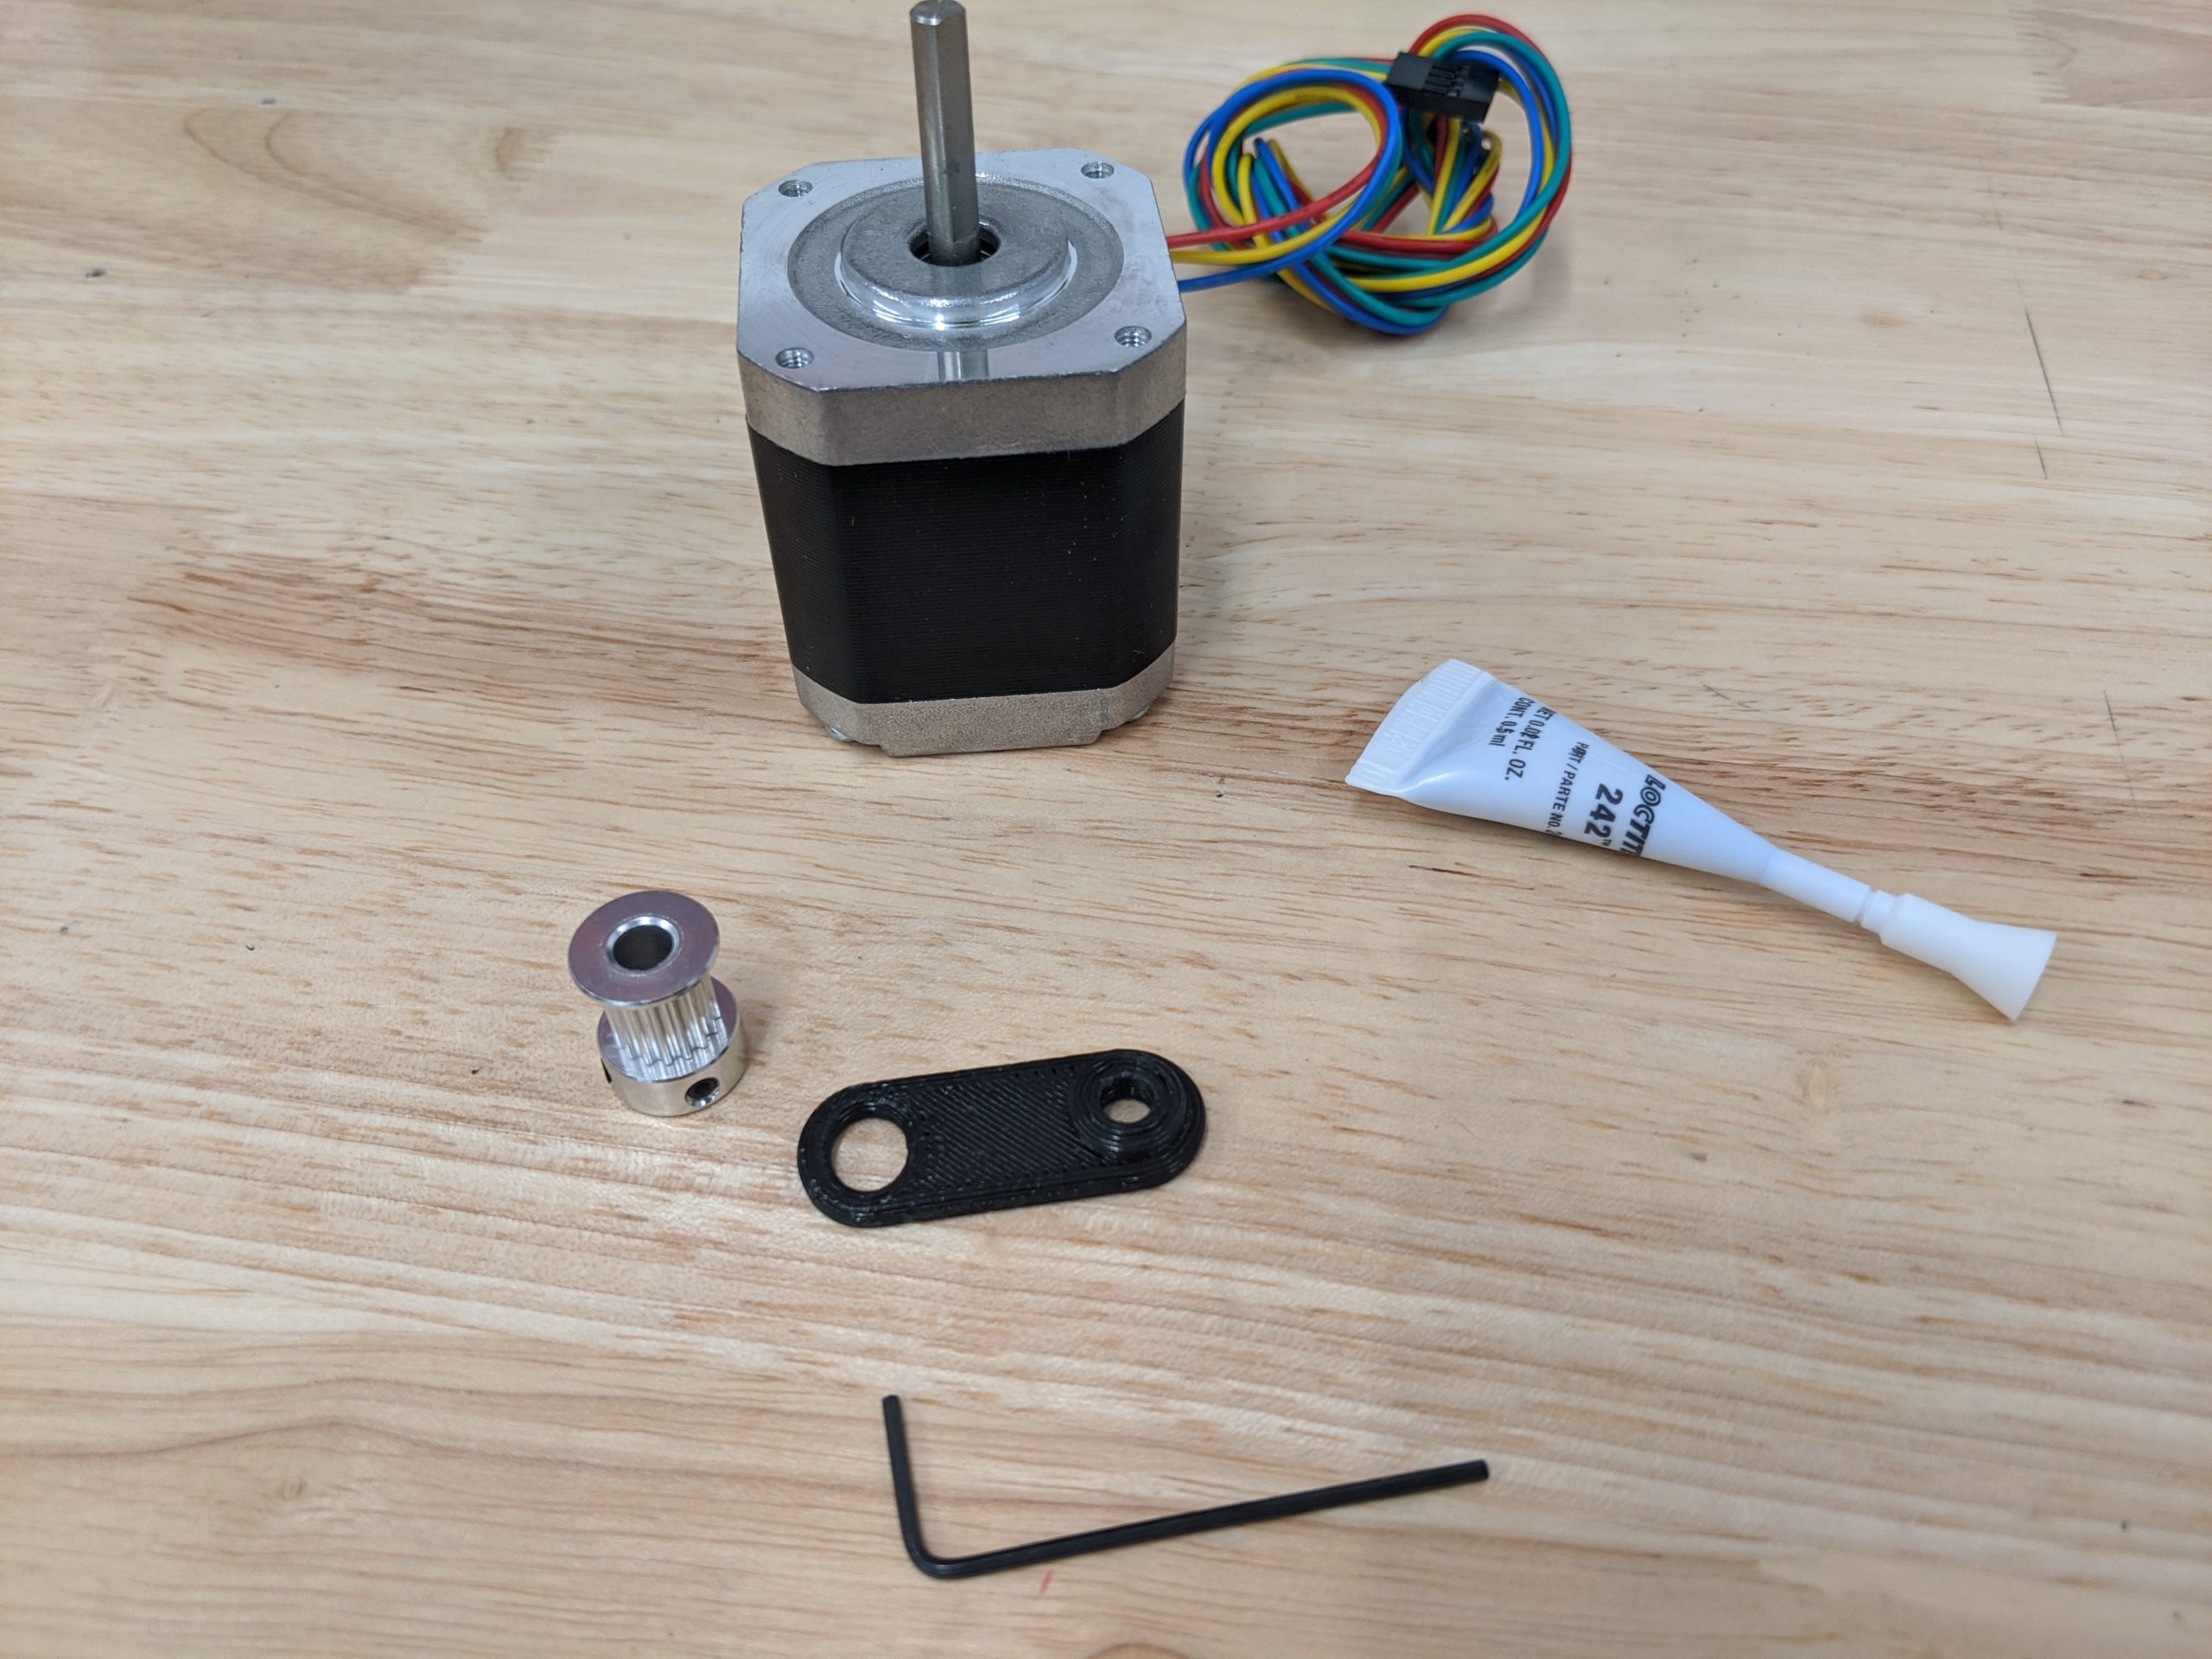
- Steppers
- Pulleys
- Wire Darryl / pulley spacer
- (optional) Loctite

- You can use the Wire Darryl to set the pulley height or just do it by eye in the next step.

- Make sure the pulley is aligned with the idlers.
- (optional) Add Loctite to the grub screws, even a bit on the stepper shaft can help.
- Tighten the grub screw on the stepper shaft flat first.
- Tighten the second grub screw.
Tip
Loose pulleys are probably the number one issue we see on both the MPCNC and LowRider CNC builds. They cause all sort of erratic behavior and false “skipped steps”. Take your time and do this correctly. Notice it does not say tighten the heck out of them. Get them on in the right order, directly on the flat, and Loctite is your friend.
Steppers
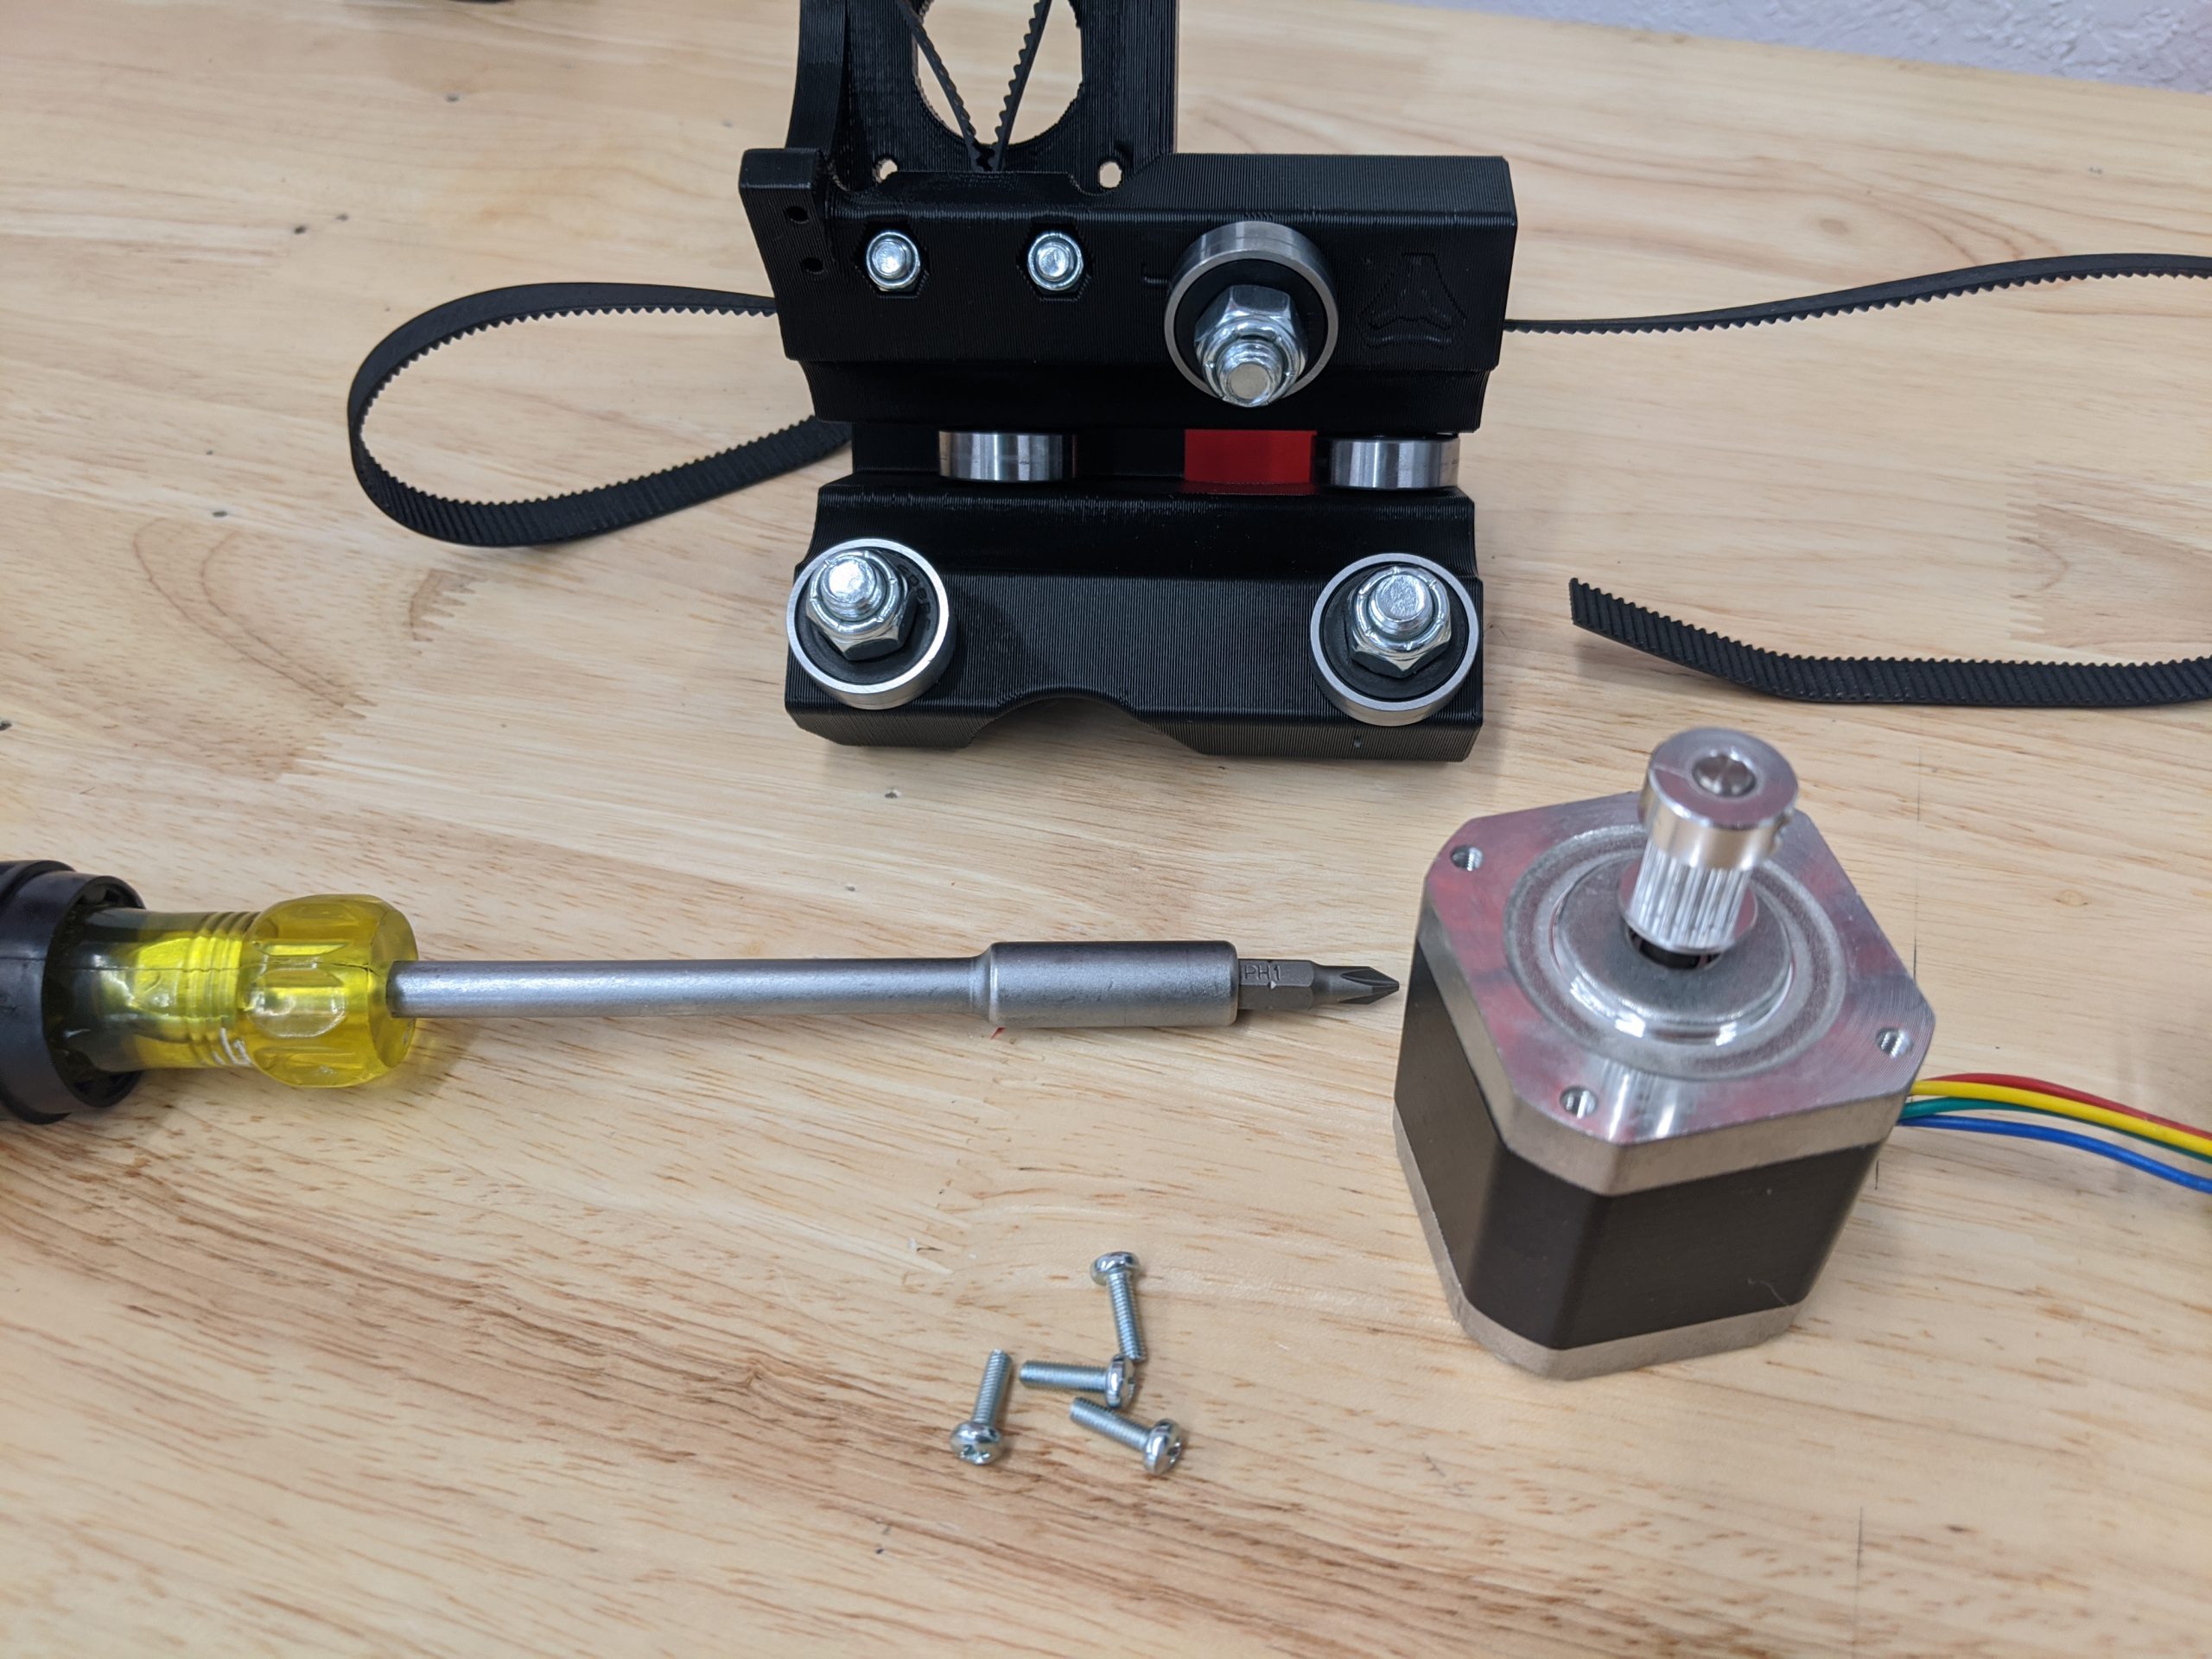
- M3 x 10mm screws
- #1 screwdriver
- Truck assemblies and stepper assemblies.
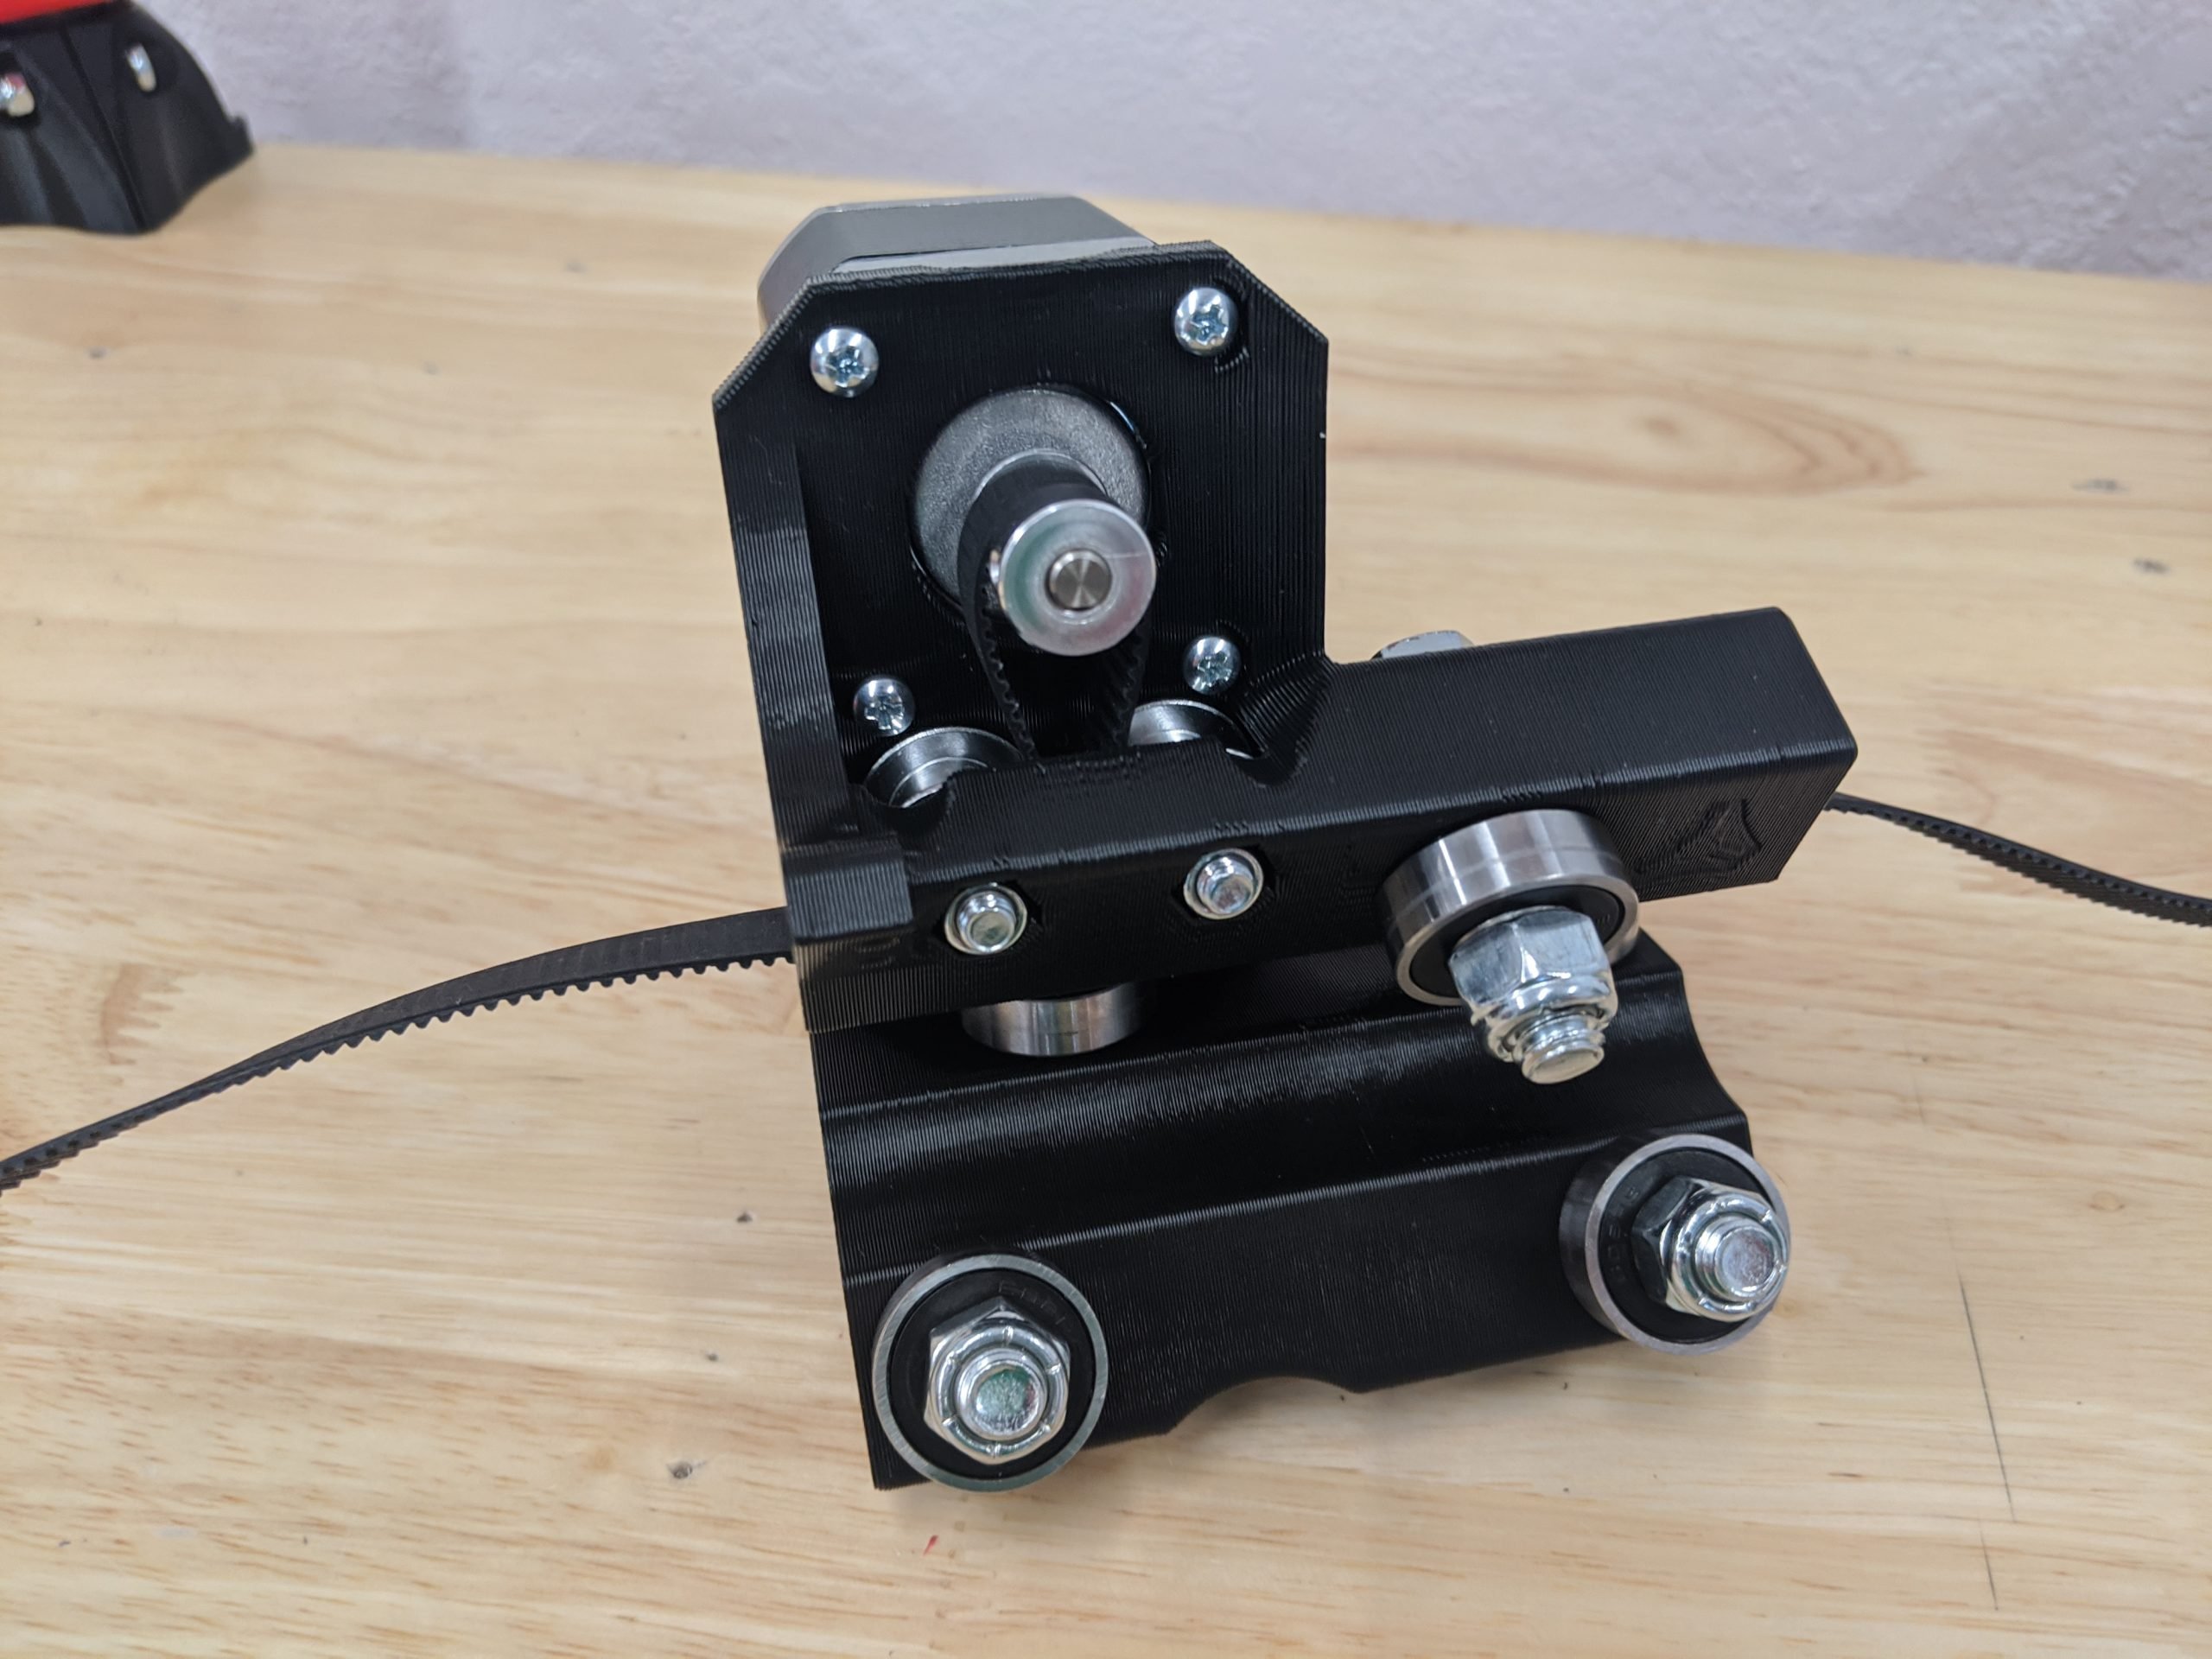
- Snug down the screws evenly.
- Double-check the pulley and idlers are still aligned.
Optional End Stops
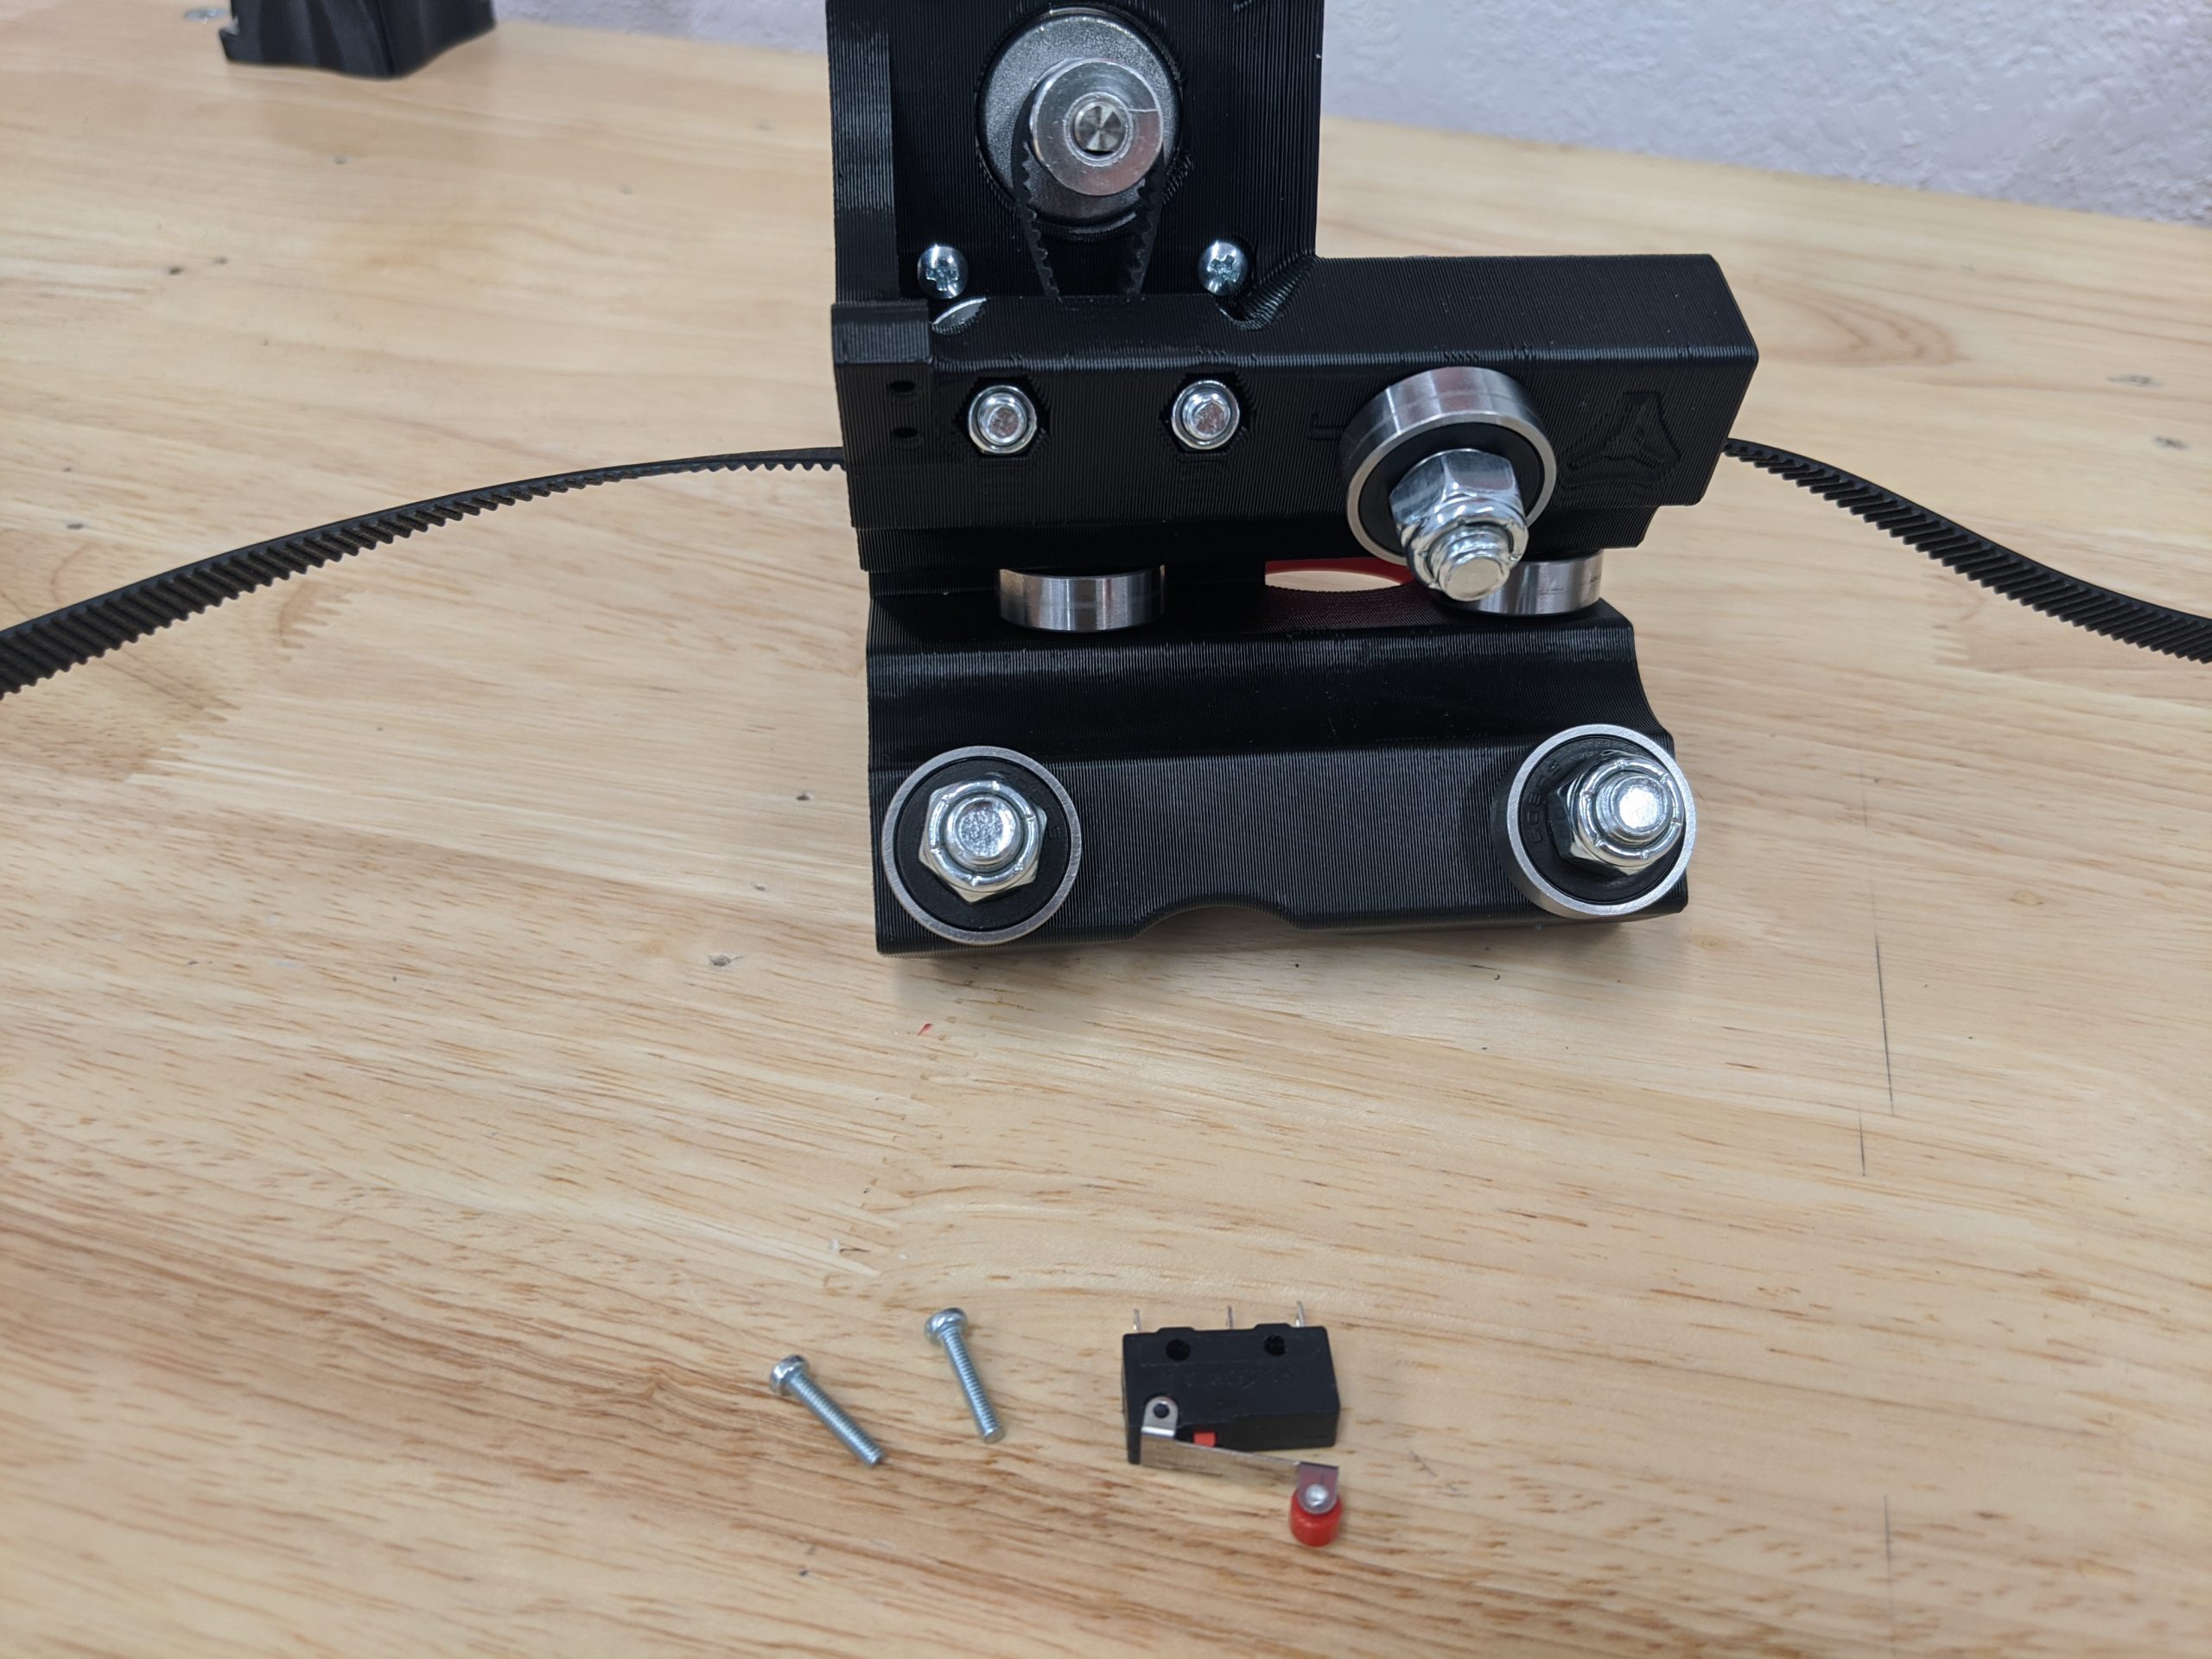
- M2.5 x 12 screws (or #3 x ½” wood screws)
- #1 screwdriver
- Limit switches
- Orient the end stop so the trigger is nearest the belt and rail.
Boom! Trucks are done buddy!