Lasers
Safety
Eyes
First and foremost, these really are dangerous, not like ripping the tag off your mattress. These can and will blind and or burn you in less than 1/100th of a second, It takes ten times that long to even react by blinking if it is in the visible spectrum. Did I make my point yet?
Safety glasses are paramount. This is not the place to try and save money. You need a high quality pair and anyone else that could be around it needs the same quality. The cheaper your laser is the more money you will need to spend on the safety glasses. Import lasers are notorious for being multiple wavelengths, over powered, and this makes them more dangerous. High quality lasers are of a known wavelength and strength therefore they are easy to protect yourself from. Import lasers can contain other wavelengths that the supplied goggles may or may not protect you from or be more powerful than your glasses are rated for. Buying laser goggles from a quality supplier should cover a wider range of wavelengths and offer a high power rating.
While we are on the subject, the laser looks extremely harmless in the goggles, kids (and most adults) will try to take off the glasses immediately so no youngsters (or tough guys) unless the laser is fully enclosed behind a laser shield and you trust them to listen. In the glasses the laser is just a bright dot but you can see in your periphery the entire room lights up. You never know when the laser could hit something slightly reflective, your mount could fail, the gcode could cram it into the surface and break your mount, your air assist could drop into and reflect the beam sending send a death beam in any direction.
Lungs & Skin
The other end of the safety spectrum is the material you are working with. You can’t just go etching and cutting things willy nilly. Ever think you could make chlorine gas or cyanide in your own house….now you can. Laser cutting vinyl or ABS plastic does just that. Two extremely common materials. Here is the list I refer to most often, if you have a link to a better guide please let me know. Best practice is to contain all the laser smoke and direct it through a filter and vent it outside, at the very least vent it outside. You do not want to breath any of the smoke any modern man made material makes.
Fire

Now this one might be a little bit of a surprise to some and obvious to others. Lasers are burning your material, add air assist directly to the burn zone and strong ventilation fans and you end up with the best recipe for fire ever. Pay close attention never leave it unattended and have the appropriate type of fire suppression on hand. Fire is not extremely common on good cuts but if it does happen it happens stupid fast with all that force fed oxygen.
Basics
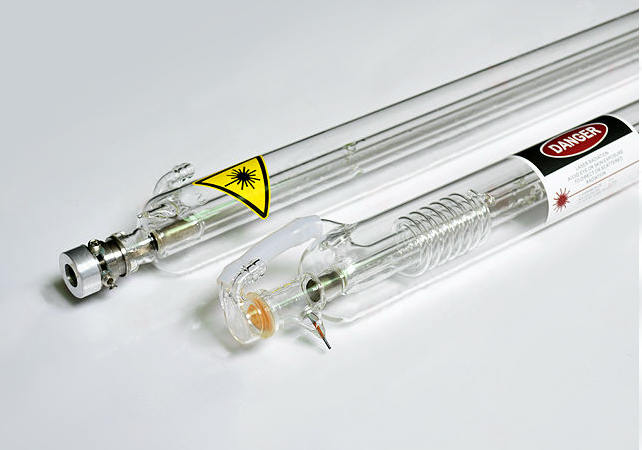
Types
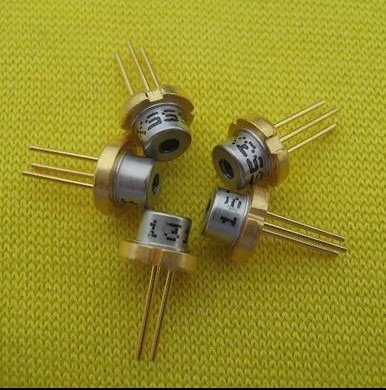
Two of the most common lasers in the maker world are CO2 and Diode lasers. Diode lasers are much more compact, have self-contained interchangeable optics, and are an order of magnitude lower power than a typical CO2 laser. More on the Power in a bit. These lasers operate at different wavelengths and this can have an effect of the type of material they are suitable for. Diode based lasers can range in price from a few dollars up to a few hundred, and CO2 based lasers start at a few hundred and go up from there. Both lasers have some sort of focal lens, but a CO2 laser also has a mirror system to steer the beam before focus. Diodes can be cooled with a small fan, CO2 use water and sometimes a chiller.
Typically on any of the V1 Engineering machines you would be using a diode based laser. If your goal is to cut wood or plastic you should be looking at a CO2 laser. A Diode is best at marking/etching, and is only capable of cutting light materials (foam, paper, plastic) and very thin wood.
Power
Laser power, not as straight forward as you would think. Higher numbers in general mean thicker materials can be cut, or etching can be done faster. Numbers are not everything! A laser has four things to consider when talking about its power; wattage, spot size, focal length, spectrum.
- Wattage
- The overall power output of your laser (like a light bulb, energy per time). On most non-laser specific machines we are limited by speed. Okay stick with me, just like strapping on a chainsaw motor to the MPCNC stronger is not always better. Since we can only move so fast before we start to get motion degradation you need to size your laser accordingly. A strong laser moving slowly will have an extremely limited range of grey levels. For example at the same speed a higher powered laser will have to use power 1-20 so you don’t start a fire (19 levels of grey), but a lower powered laser will be able to use power 1-255 (254 levels of grey) without starting a fire. Make sense?
- Spot size
- How small of a spot the wattage is concentrated on. Spot size dictates the resolution of the image you can produce, think printer DPI (dots per inch). Another side effect of spot size can be ability to cut. A poorly focused laser’s power is too spread out to be effective, a finely focused laser cuts significantly better. For a diode this can vary 100-400 micron in diameter just by laser wattage. To be more clear, more powerful diode lasers cannot be focused to as small of a point as lower powered lasers (the source is not truly a point, larger diodes equal larger initial “points”, and it is not actually a spot but a rectangular spot).
- Focal length
- This influences the shape of the laser cone (long and narrow or short and fat). The focal length is dependent on the lens you use and should be a small range depending on the lens. If you have a choice; a longer focal length can aid in cutting ability (a thinner steeper beam/cone can cut deeper before power is lost to the edges of the material).
- Spectrum
- The wavelength of the light it produces (diodes-UV to viable, CO2- mid-infrared). Materials react differently to every spectrum as do safety glasses. If you have a specific need do your research before buying.
- Duty cycle
- One more thing on the topic of power, duty cycle or continuous time on. On the cheap import look out for sensational things like “15W $50!” somewhere in the description it could say “One second continuous operation time”. This means they are over driving the heck out of the laser, it will not last long, and at 1 second bursts it is not very useful. Guard your wallet from these Scammy Chumps. I just found another ad that says no more than 30min continuous, that might sound like a lot at first but you can do some really detailed things that take a few hours.
Air Assist
To get cleaner etching, deeper cuts, and to save your lens you need some sort of air assist. While using your laser your material will produce smoke. This smoke if not directed away will stick to the material you are working with producing a sooty poor looking cut or etching. This smoke will also stick to the laser’s lens and very quickly build up heat before you know it the lens will break. Bare minimum you need to have a 40mm fan clearing the area, even better are radial fans (higher pressure more direct), or even better yet a small compressor. If you have the ability to hook up your compressor and aim the air stream you can get significantly better cuts this way. Once again don’t forget to vent your fumes safely and accordingly.
The Hard Part
Choosing
Choosing which laser to buy can be the hardest part.
If this all already seems overwhelming just buy a JTechPhotonics kit. Why; it is a trusted laser/company, glasses proven suitable for it, complete kits available, the only kit that is US legal, and the connections and use are as simple as it gets (more later). I think the 2W kits are a great deal. If you have other companies to suggest please let me know, and I will check them out.
PWM, TTL, WTF?
PWM, and TTL in this context are just how the power of the laser is controlled. All we really care about is if the laser is controlled by 3.3V, 5V, or 12V. Good brands and companies make this abundantly clear, if you are buying an import this is by far the hardest part of the whole thing. The specs are not clear, the wiring diagrams are typically non-existent and if they are they can be wrong, we even have drivers with PCB’s with misprinted polarity so you can’t even follow that. Unfortunately import lasers, while super cheap, tend to be a guess and check game, both with connections and lens specs.
With all common boards we can handle 12V, 3.3V or 5V signals, no big deal!
12V signal driven lasers are less common (Jtech). They are simple, you plug them into the print fan port (or any 12V port) on your control board and you are good to go. Using a 12V port you will need to redefine the laser pin in the firmware.
3.3 & 5V driven lasers have the PWM/TTL pin defined in the V1 firmware as listed below. No edits should be needed. Your laser control pin needs to get plugged into this pin. Some lasers also have a TTL/PWM wire, that can get plugged into a nearby ground.
- Rambo
- Rated capacity = 10V-24V
- PWM Pin = 45

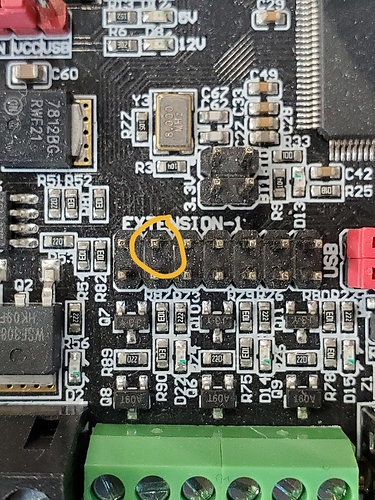
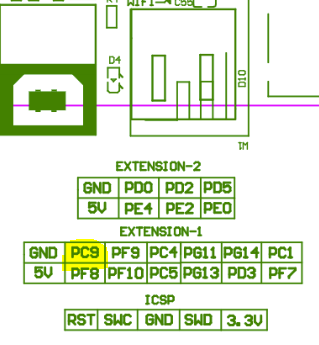
- SKR Pro
- Rated Capacity = 12V-24V
- PWM Pin = pc9
-
-
Mini Rambo
Rated Capacity = 10V-28V
PWM Pin = Currently a conflict with the LCD
Trying to redefine it as pin 23, (Zmax Signal).
- Ramps
- Rated Capacity = 12V
- PWM Pin = 44

Power Supply
Lasers need more power than the CNC does to run. You can not run your laser from the power supply included in the CNC kit. Typically your laser will come with it’s own power supply though. If your laser power supply is within your control boards rated capacity you can simply swap them out. You can then use the control boards power terminals to connect the laser’s power input pins.
Using your laser
When Using our Marlin firmware You will need to use “inline” power mode in your laser software.
Your starting Gcode will also need to include “M3 I”.
Software
This is how to turn your ideas into laser commands. There are two modes to understand, Vector and Raster. Vector is moving with the laser power relatively constant. This looks like tracing an outline, or cutting material. Raster is when you are trying to make a grey scale image while the laser moves it is constantly varying the power to achieve different levels of grey / burn, or etching.
Limitations - Vector files can be run at much faster feedrates, basically as fast as you can move your machine before you get ringing or poor line quality. Raster on the other hand sends so many commands to the boards they have to run slower to process them. Doing raster images with the Marlin Firmware you are maxed out at about 22mm/s before you start to see degradation (some very basic images can be ran faster).
Lightburn
Lightburn is currently the best laser offering out there. Very easy to use and the most fully featured. Lightburn can generate your laser Gcode as well as control and run your machine if you would like. There is a free trial if you want to try before you buy.
Lightburn has several versions of focus and raster test programs built in as well.
Free Software to try
Vector based, Solid lines
Galleries
Have a look at the galleries to see some of the ways people use lasers on the V1 CNC’s.
LowRider CNC
MPCNC